Miniature Painting Tutorial: Rust
One of my favorite things to paint is rust. But before I teach you how to rust we have to cover why to rust.
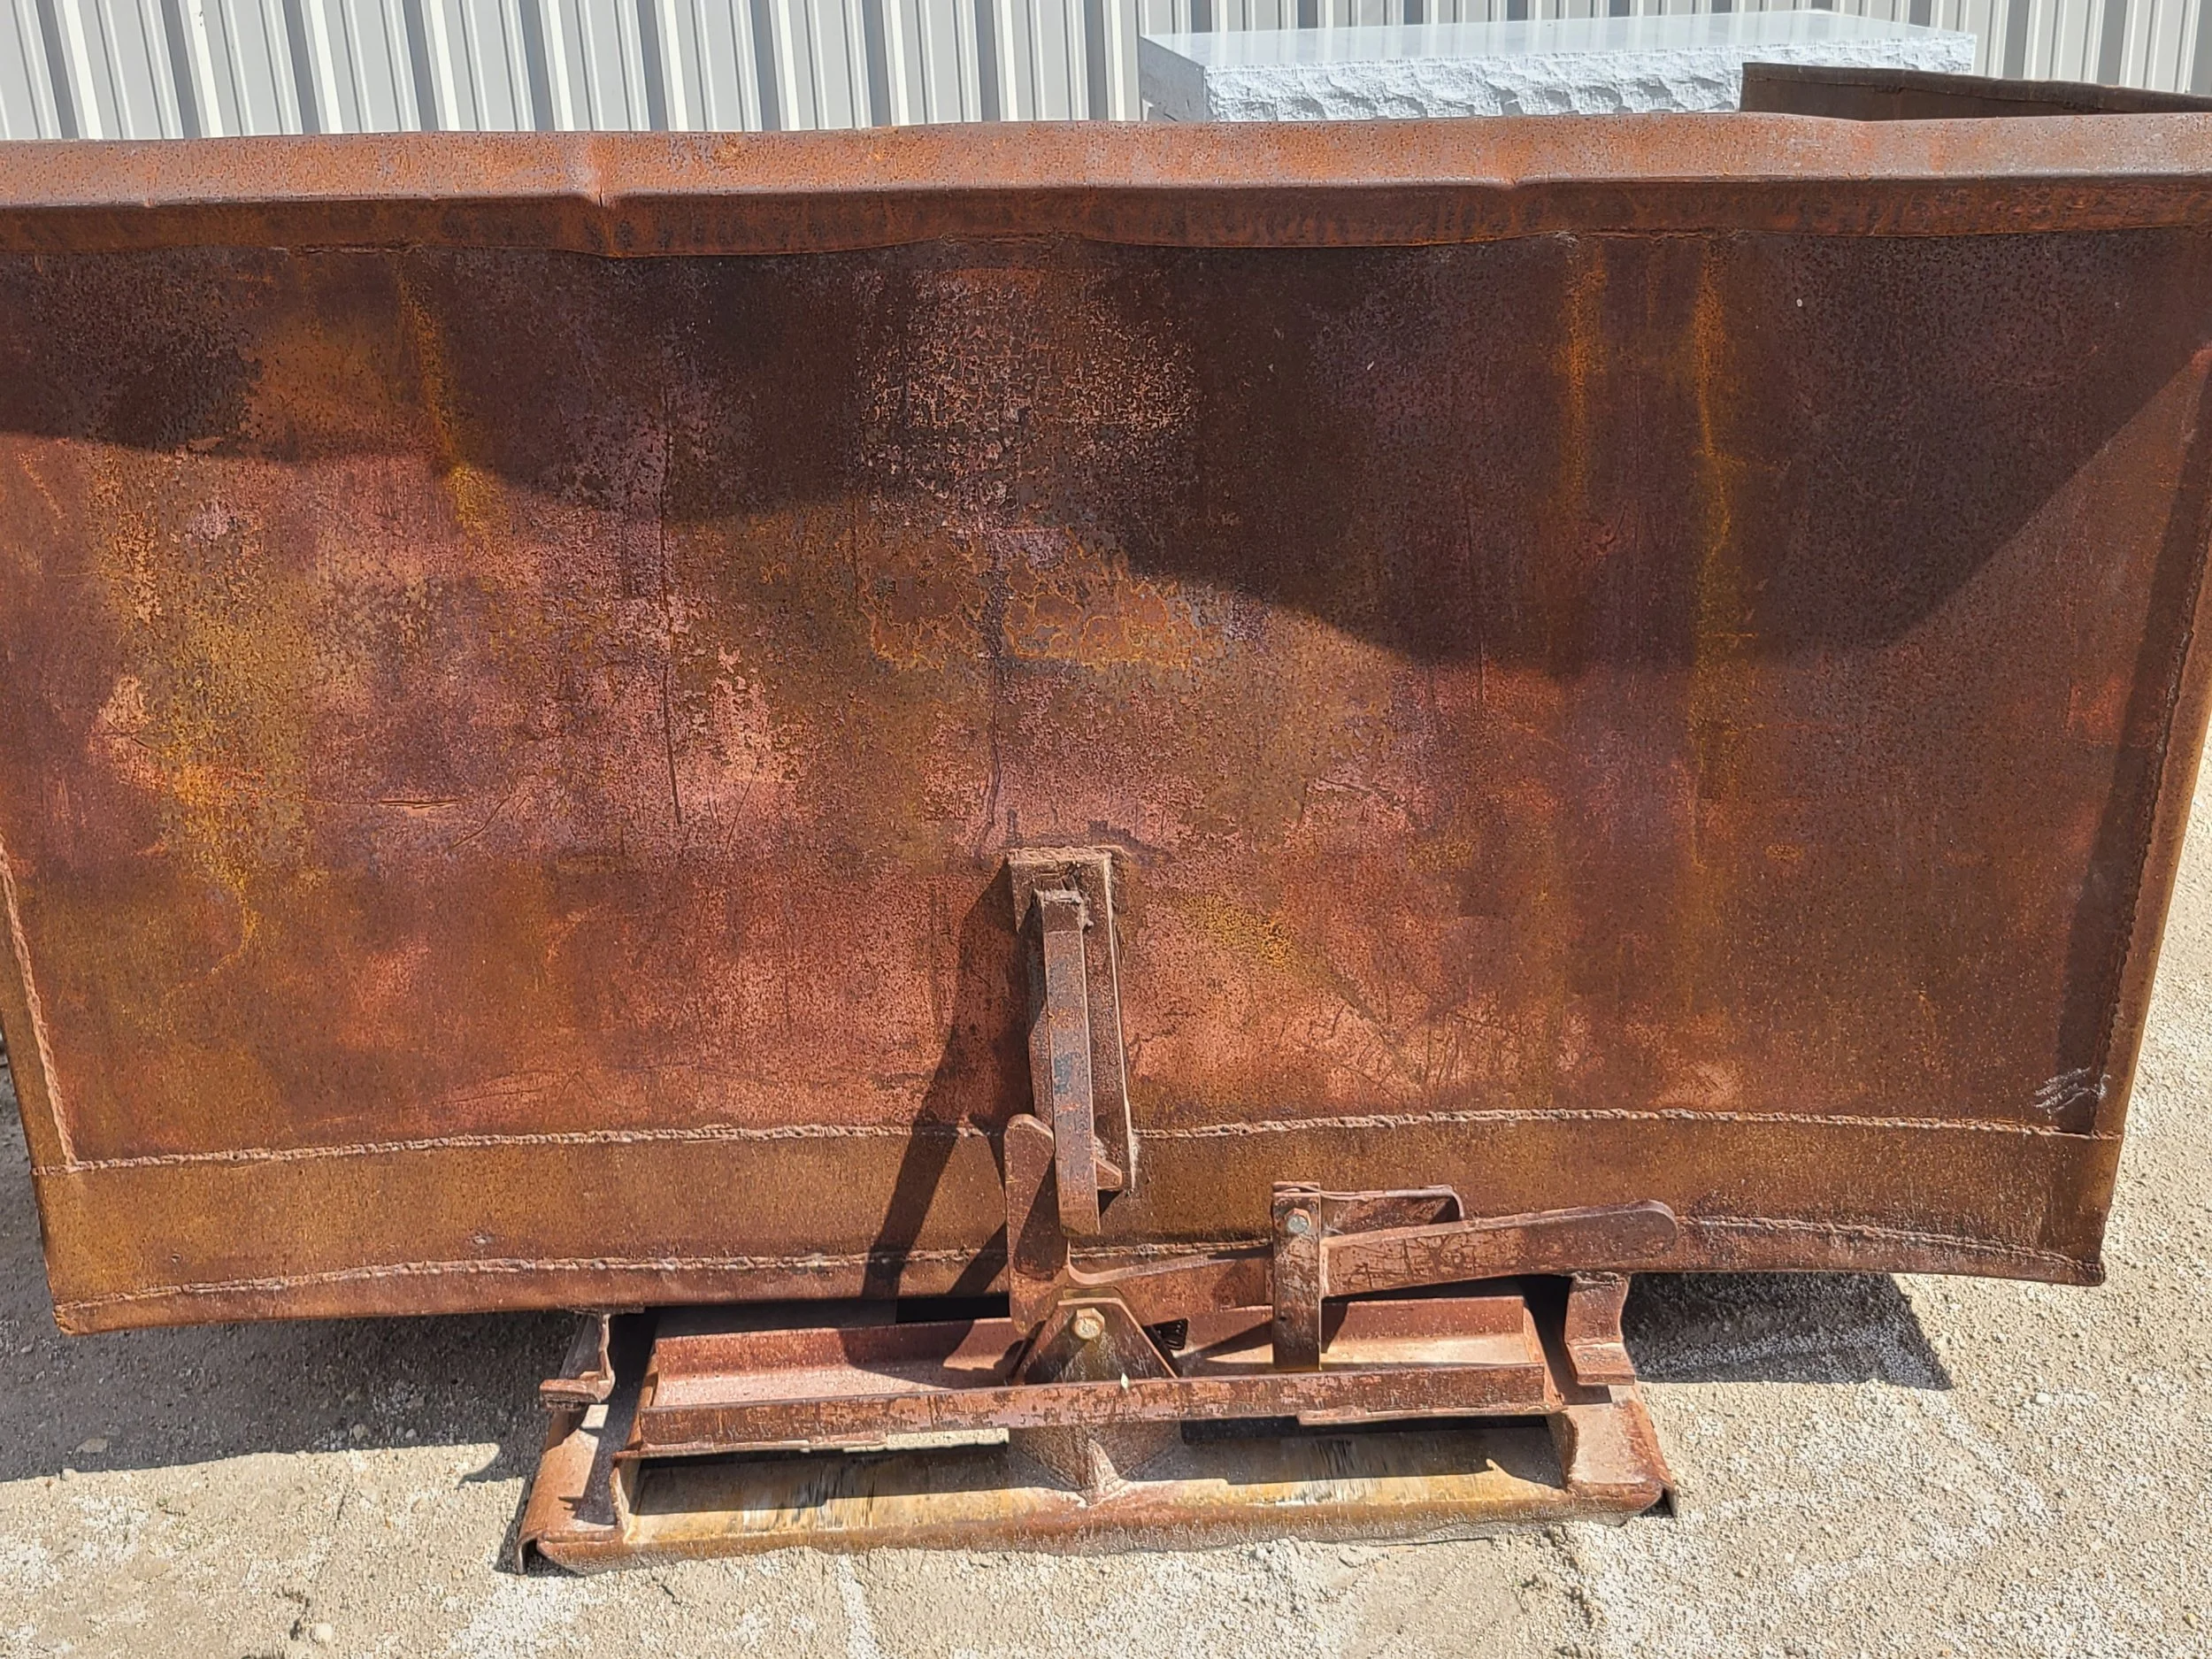
Something to keep in mind is that at its core rust makes a statement. It above all else is a story telling apparatus. It indicates decay. What is rusting is not cared for, and the severity of rust tells a story of time. It also helps tell the story of what material something is made out of. A society that can add chromium to steel doesn't have to deal with rust as much as one that can’t.
Should a knight have rusted armor? Maybe! A warrior that either doesn't care for their armor, or doesn't have the time from constant battle wouldn’t have pristine shining metal. A veteran that is hoisting a sword for the first time in decades might find the sword isn't as gleaming as they left it. Even vehicles in different environments have a story to tell. When people from northern states visit the south they are typically surprised by the lack of rust on cars. This is due to the use of salt during winter time in the north.
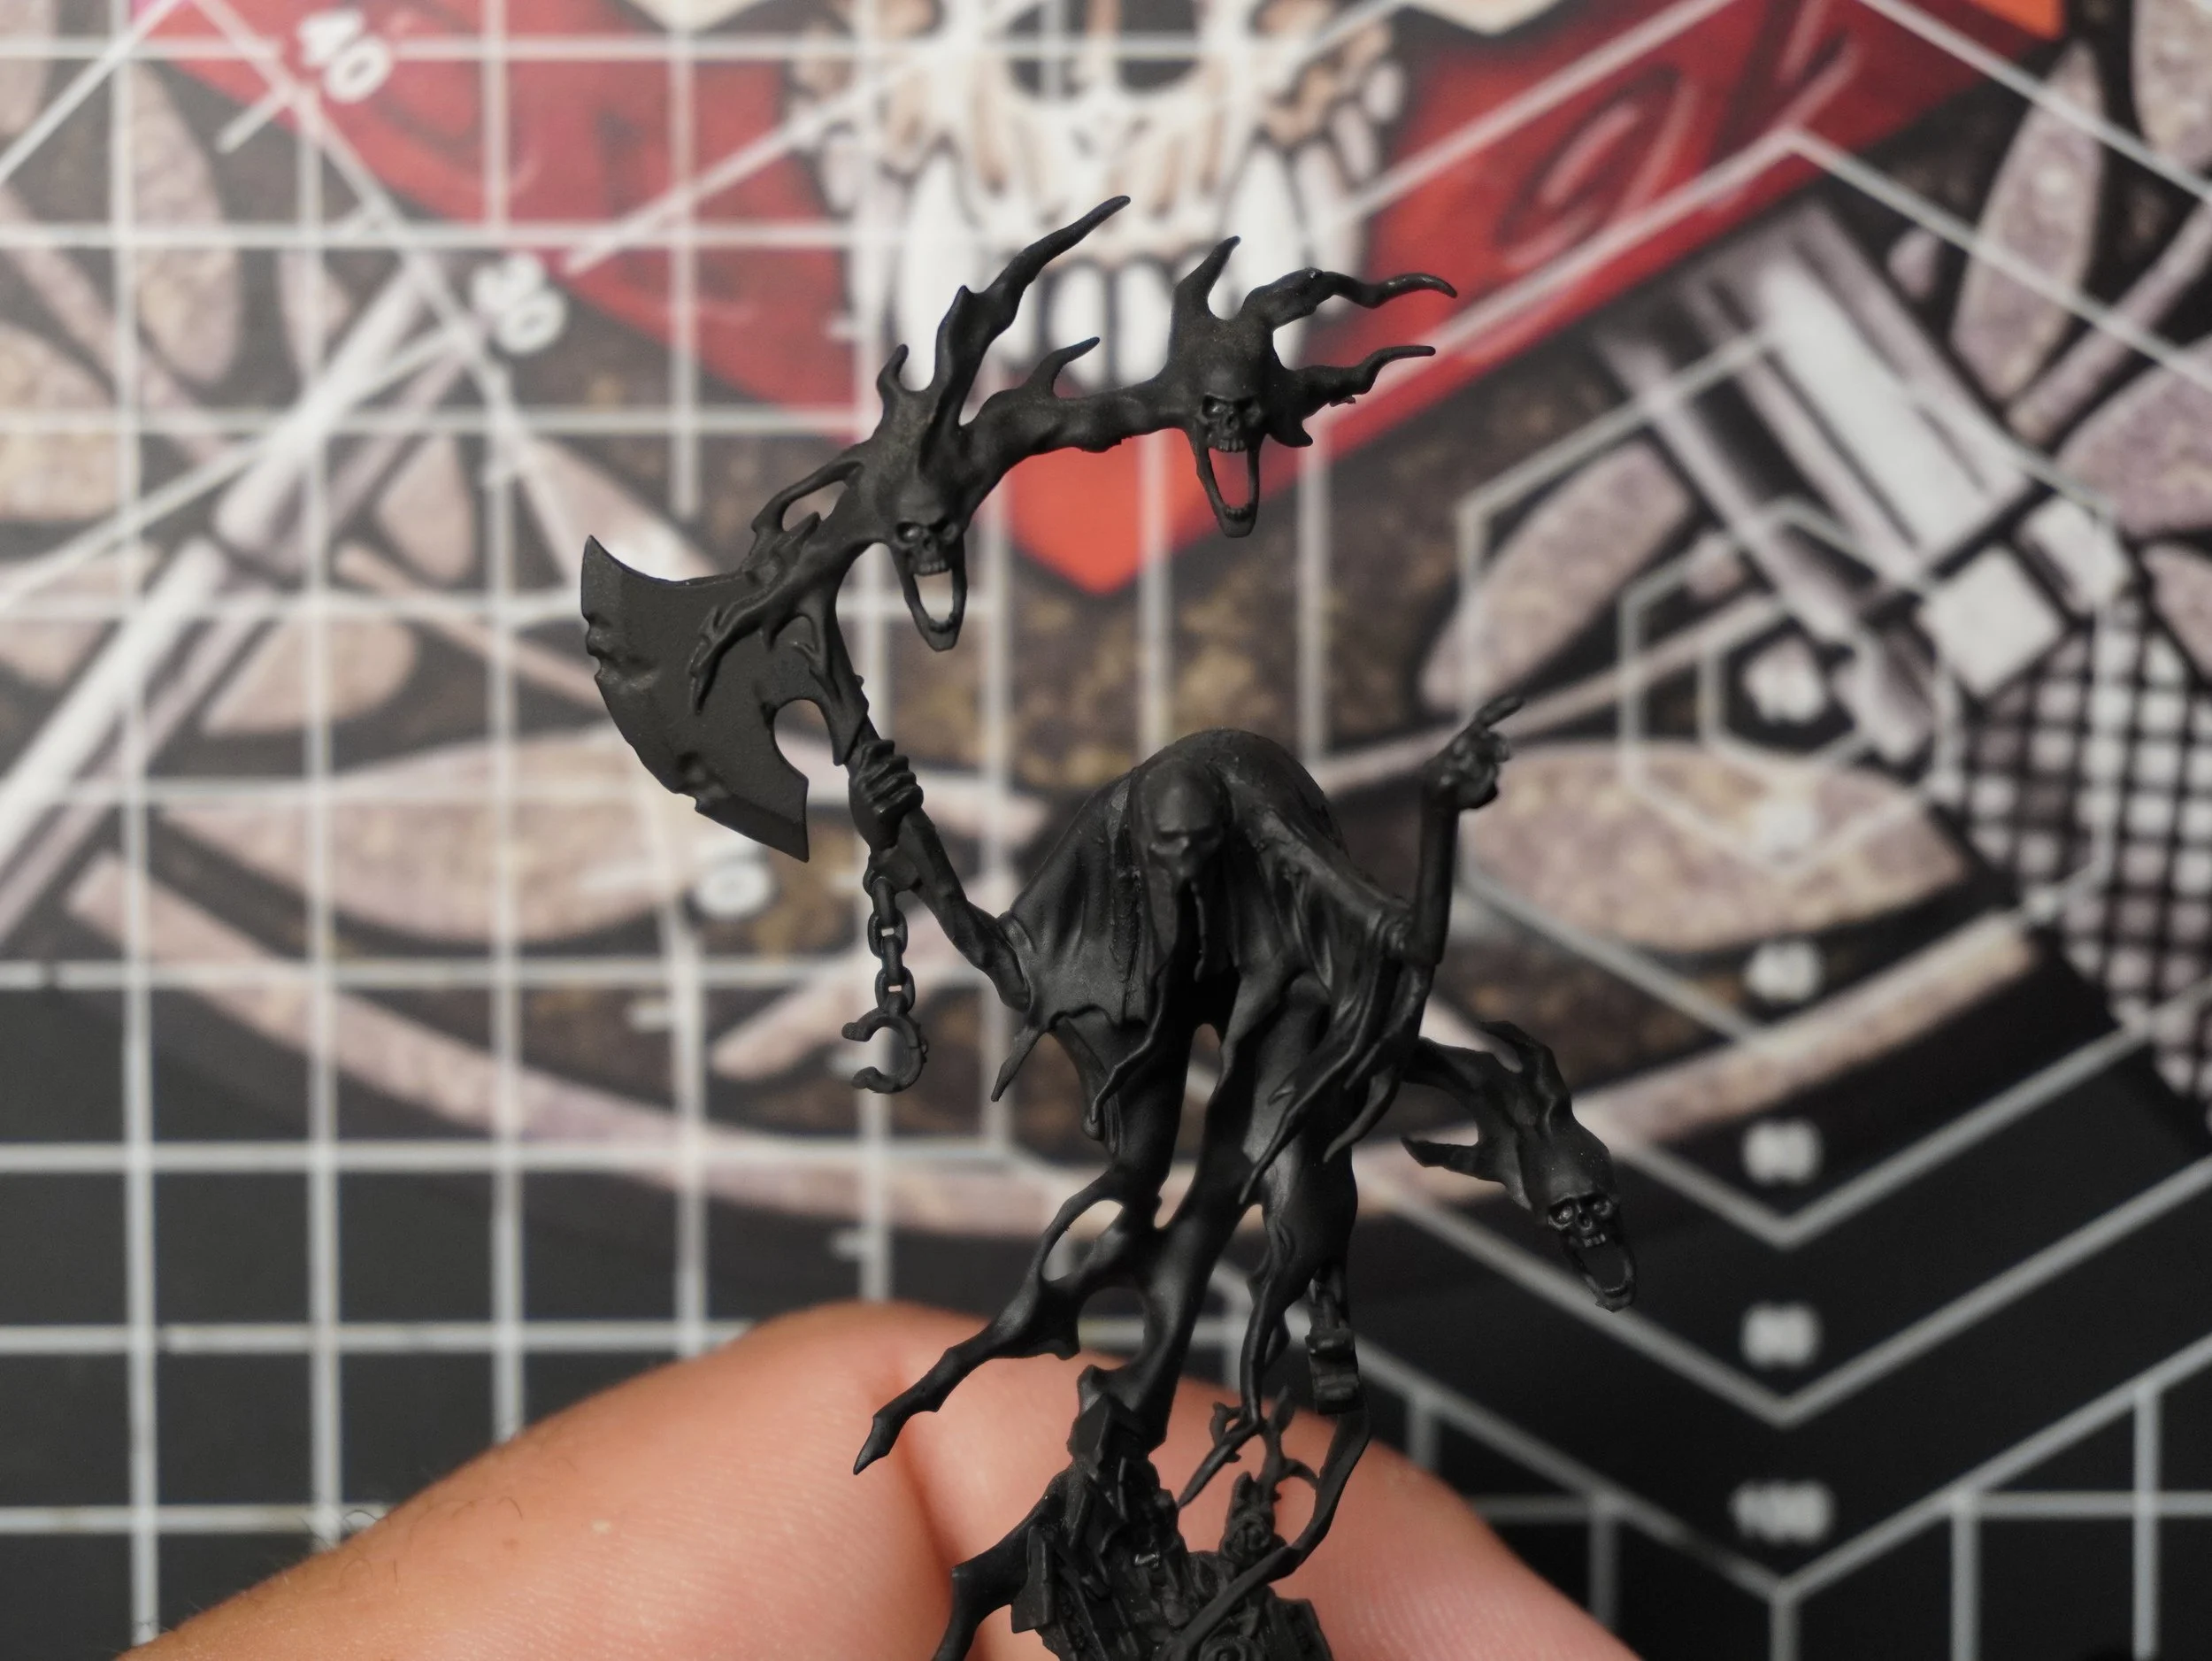
So now on to the how. I’ll be painting the axe head of the Lord Executioner model from Games Workshop. The list of paints I'm using are as follows.
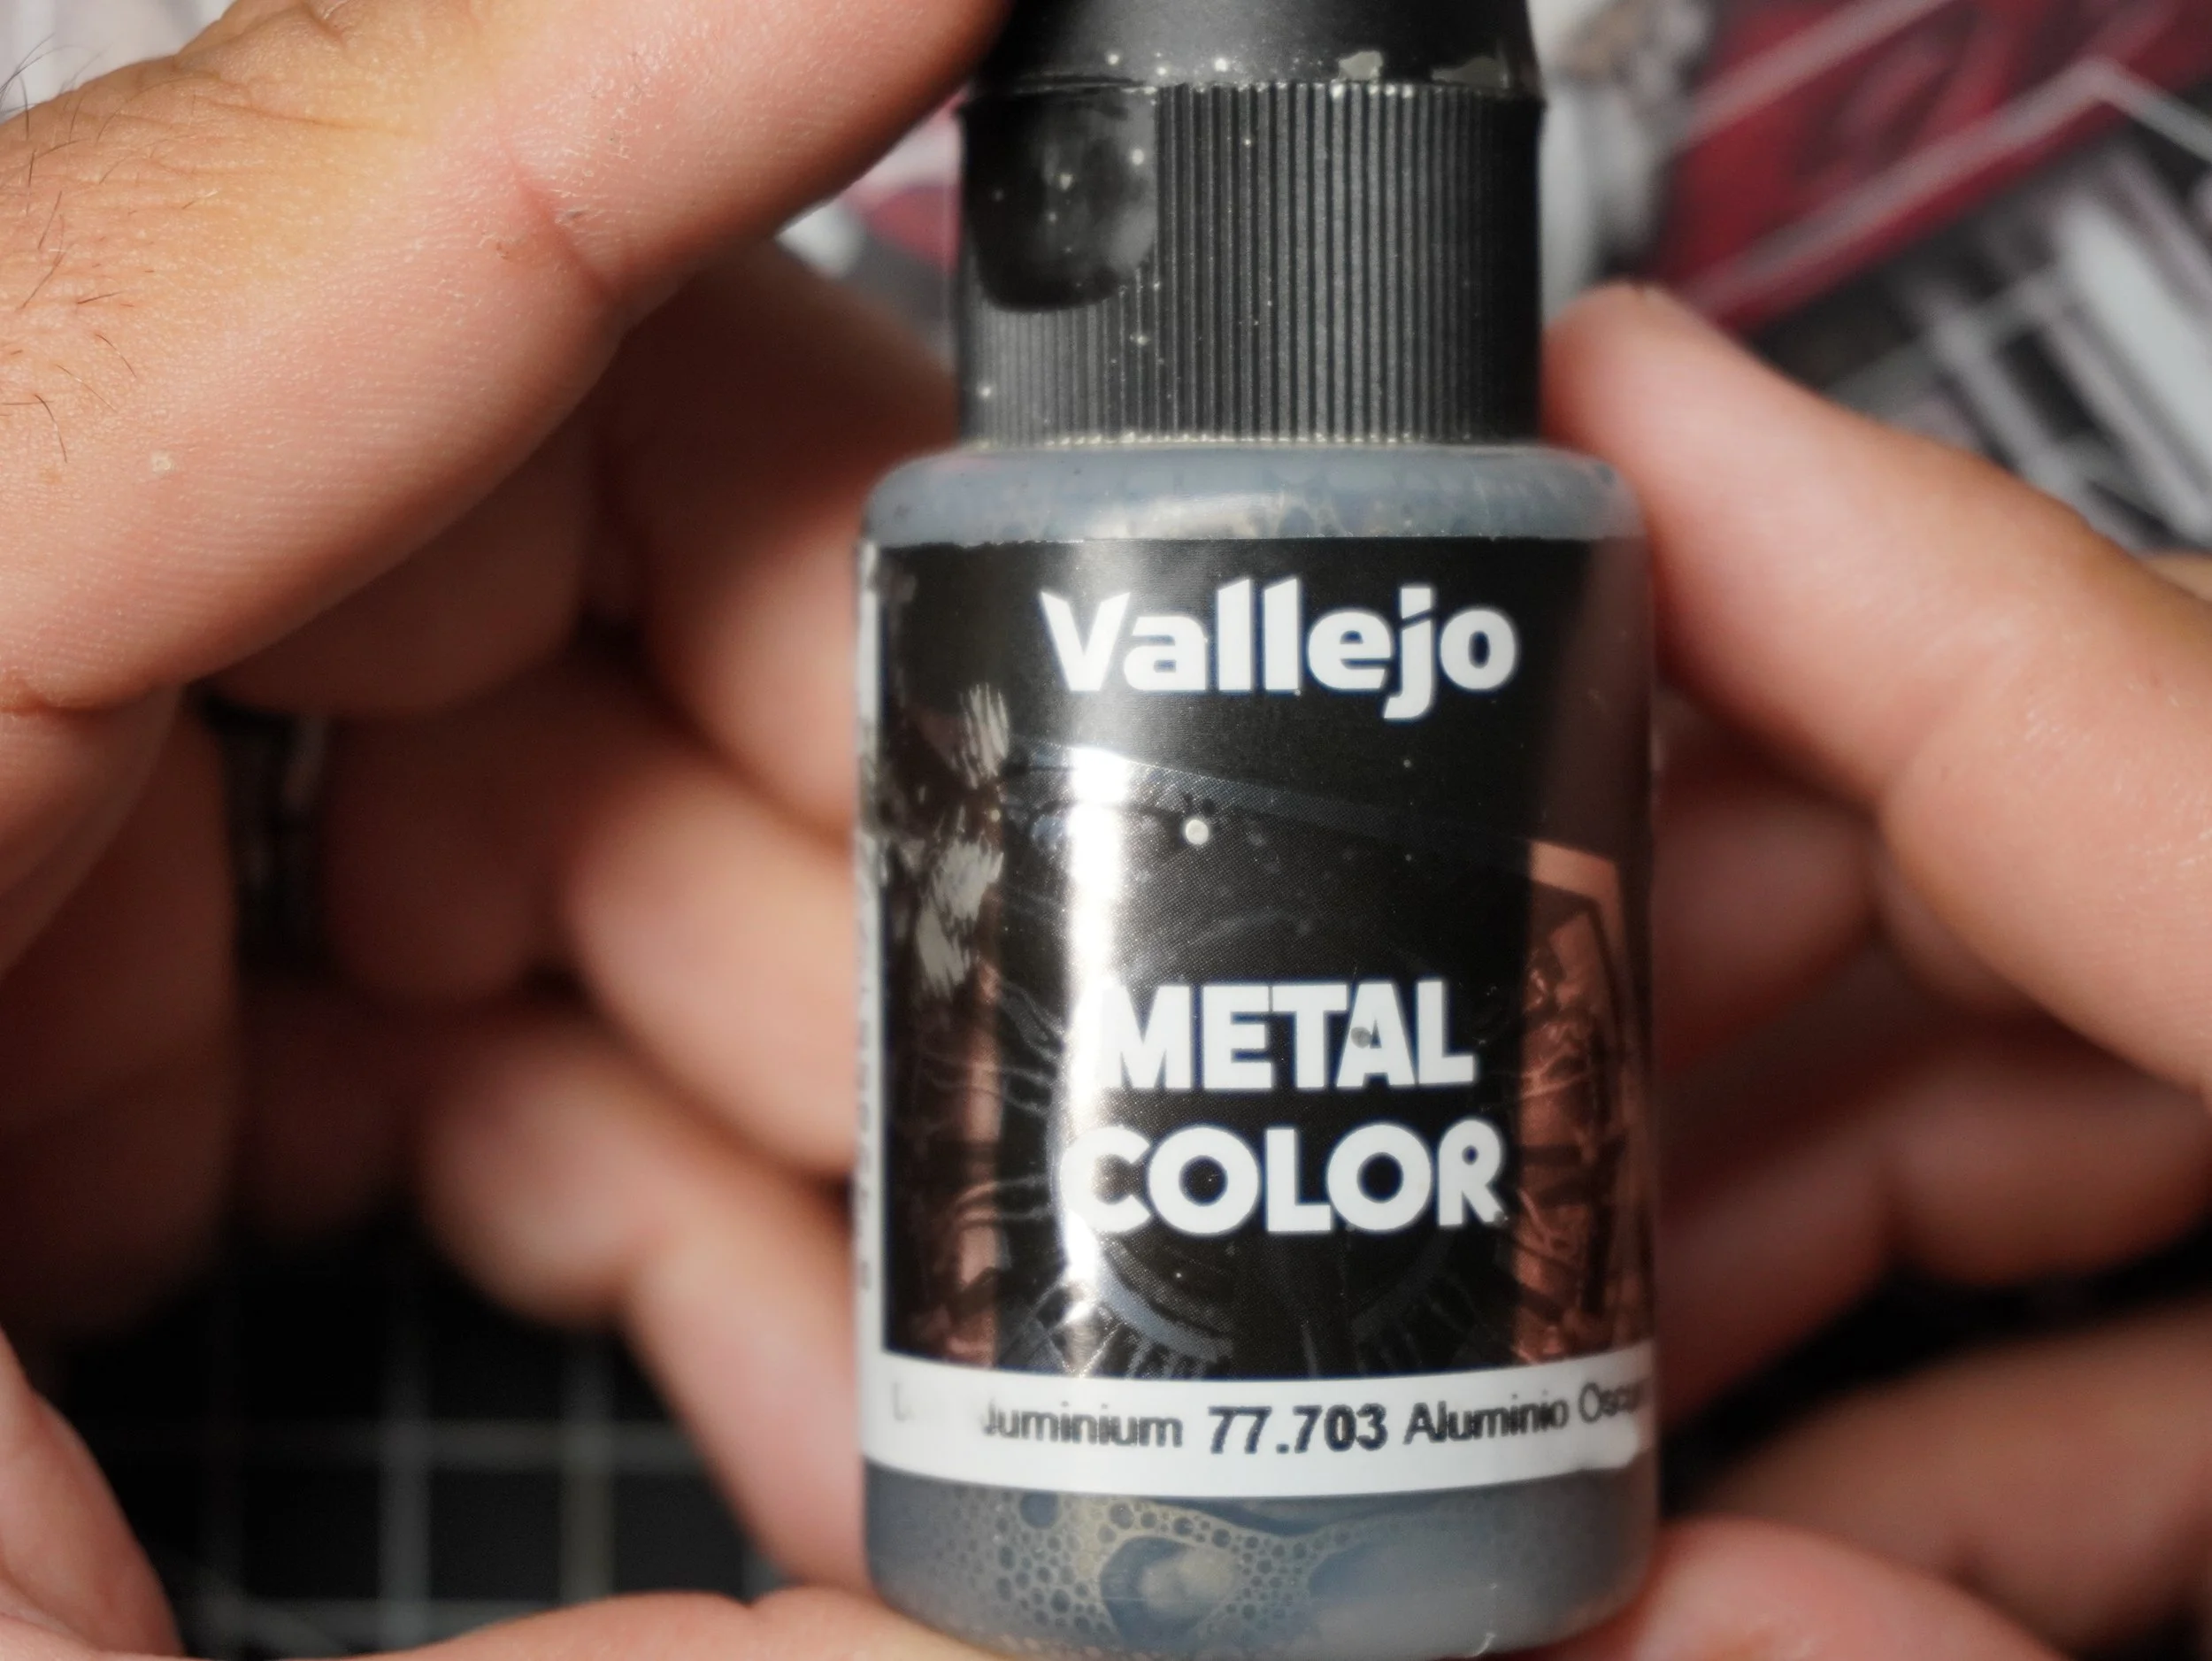
Vallejo Metal Color Dark Aluminum
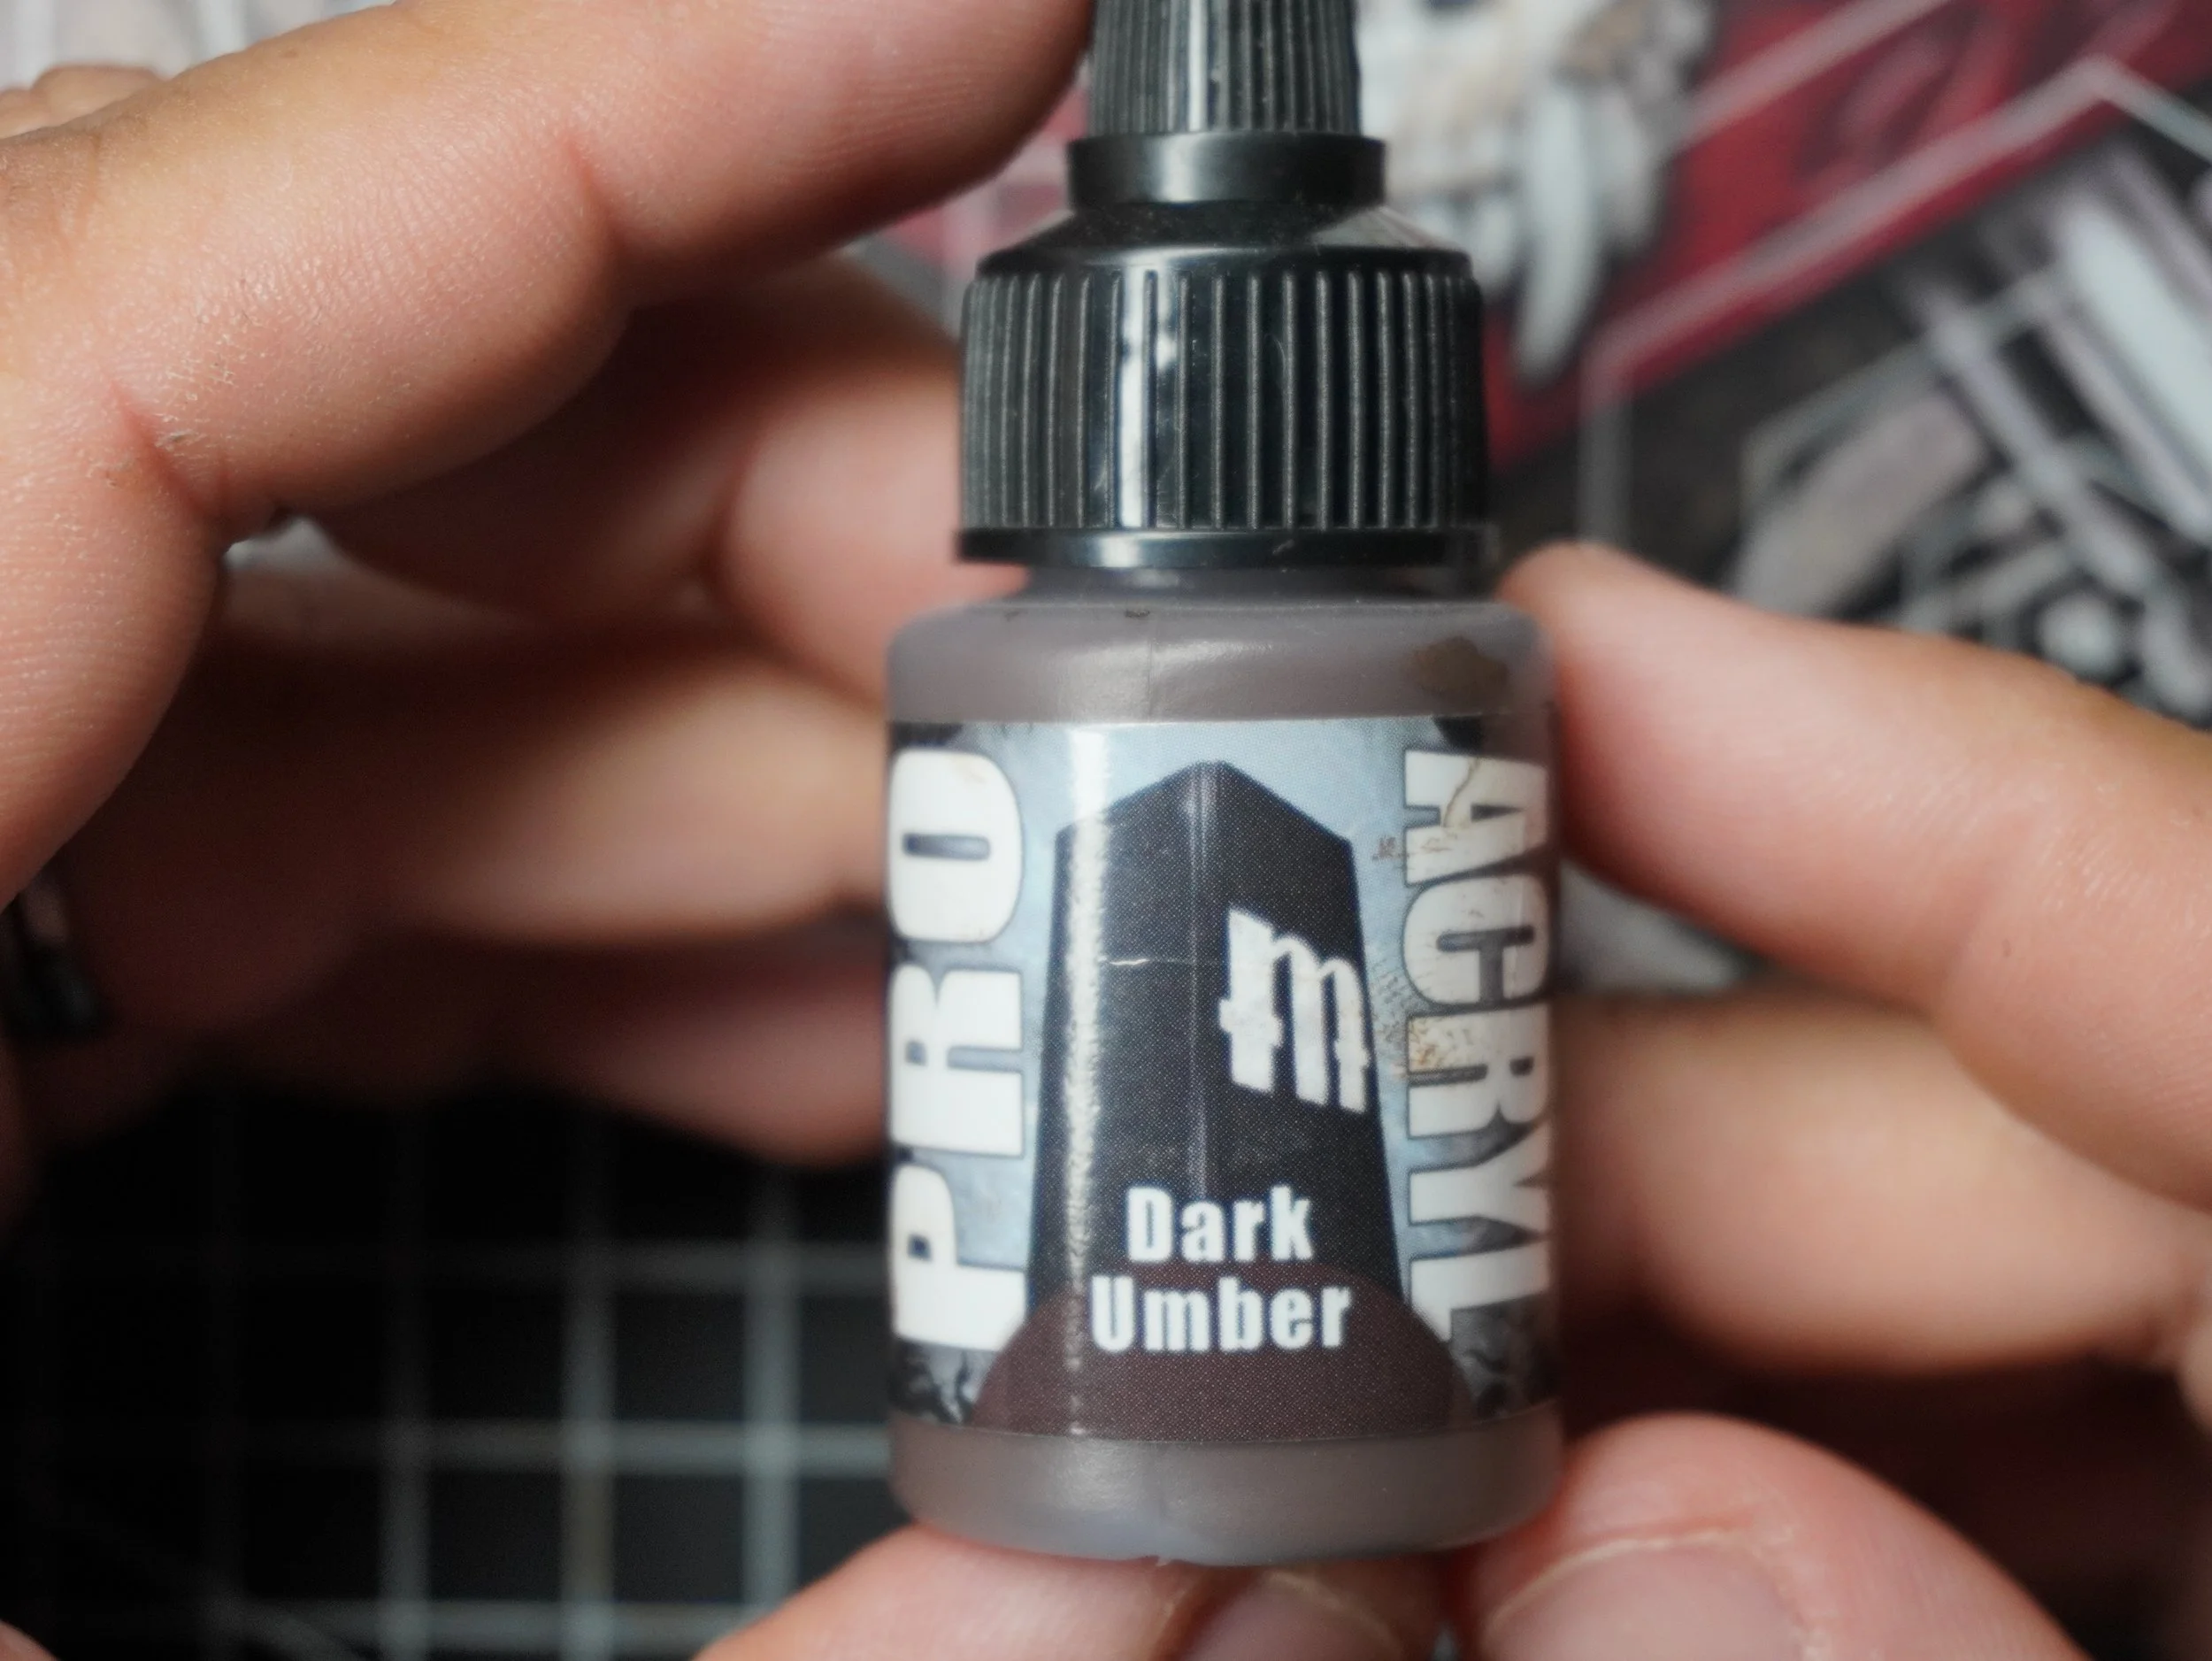
Pro Acryl Dark Umber
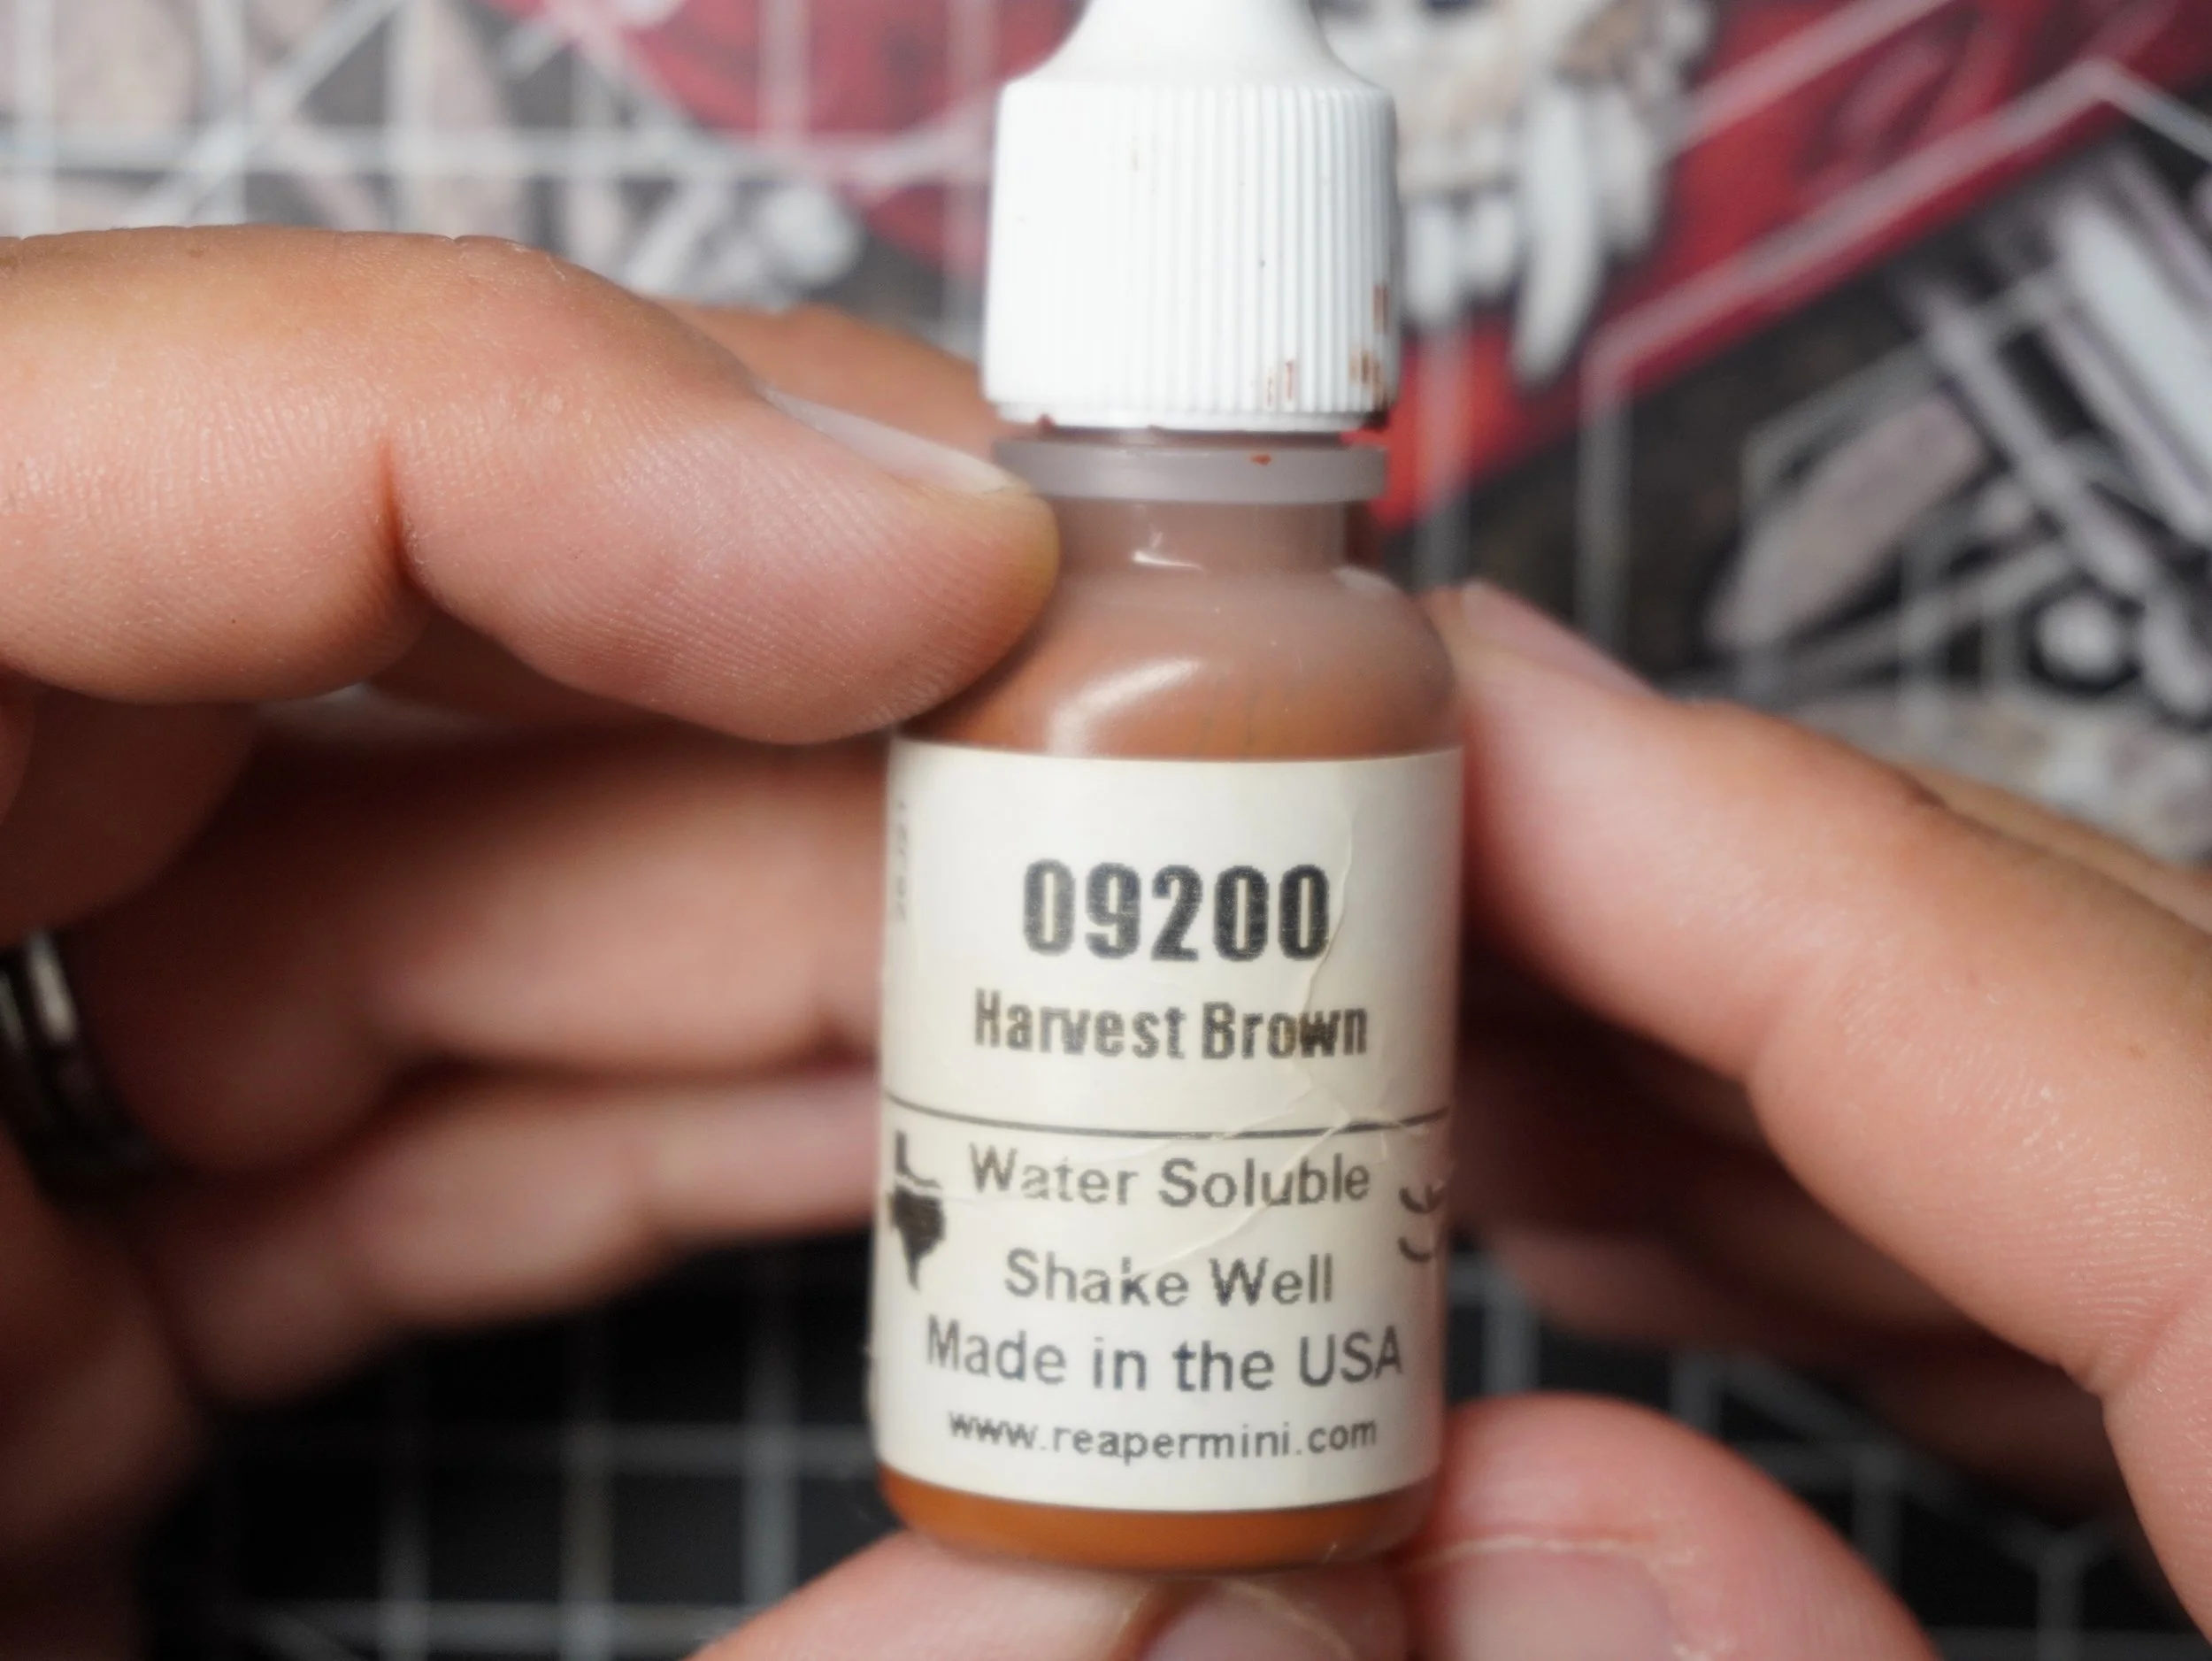
Reaper MSP Harvest Brown
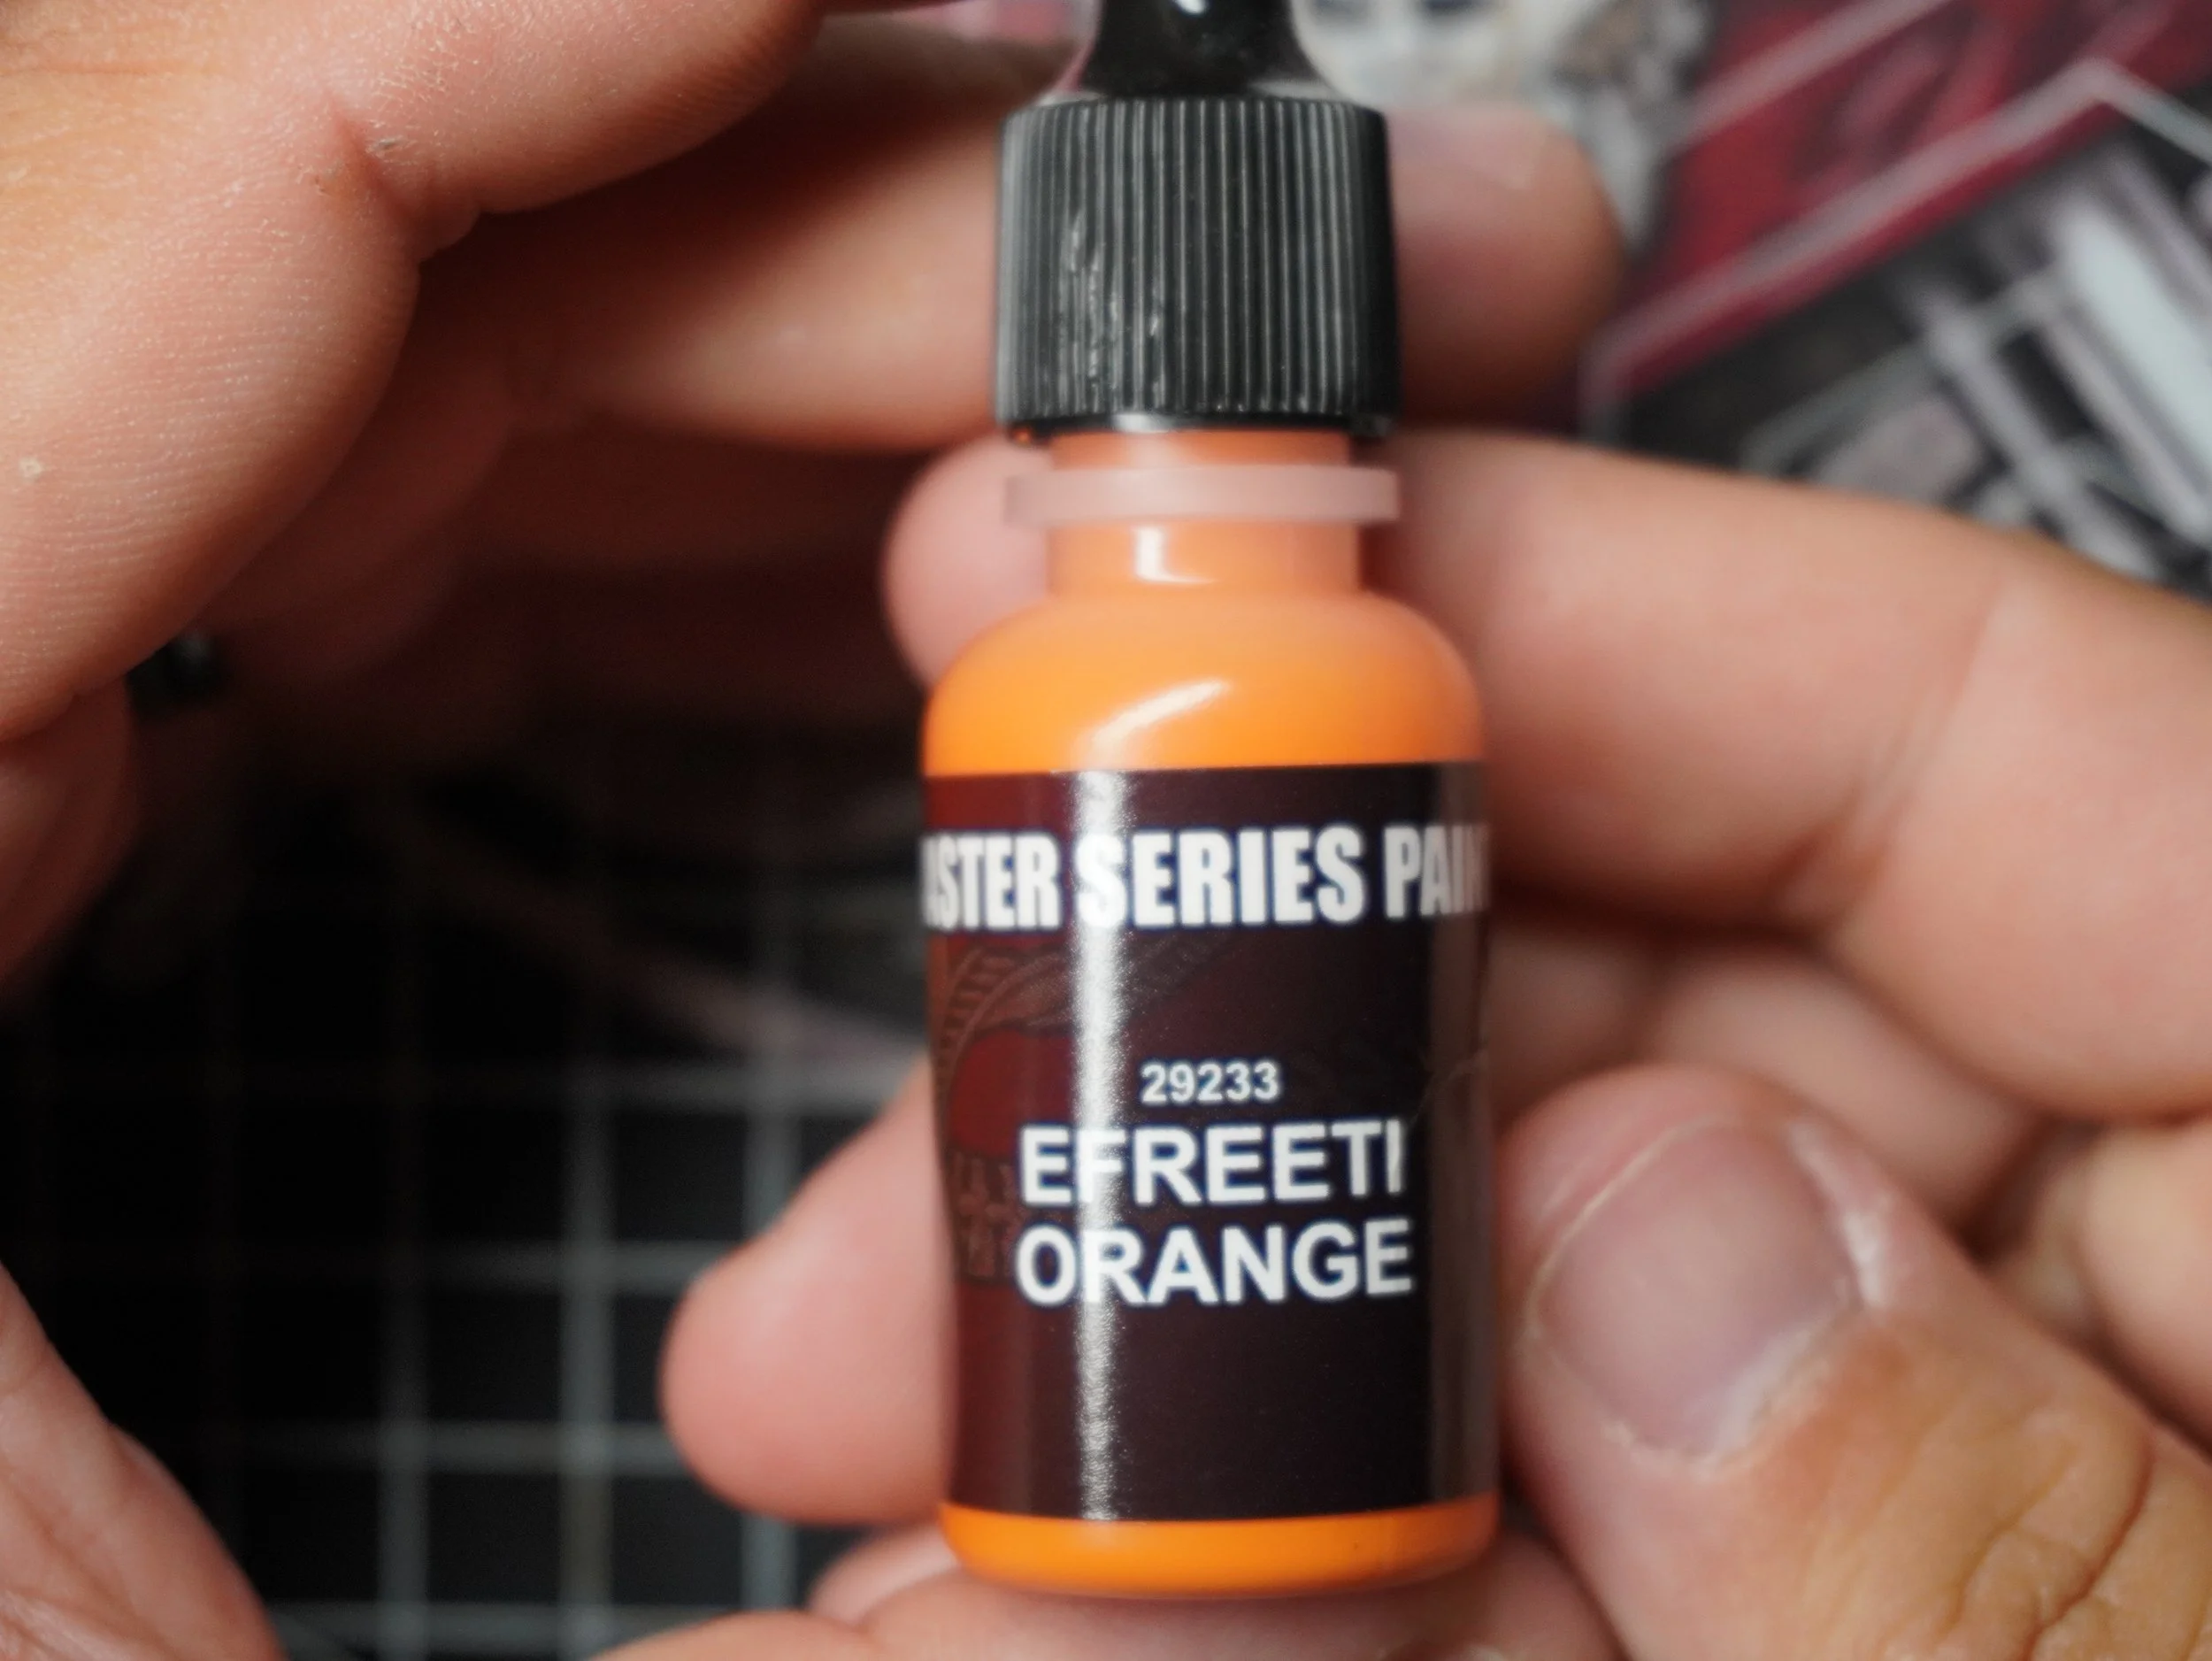
Reaper MSP Remastered Efreeti Orange
Army Painter Strong Tone Wash

Keep in mind the actual paint brands and model are irrelevant. These are just paints i’m comfortable using.
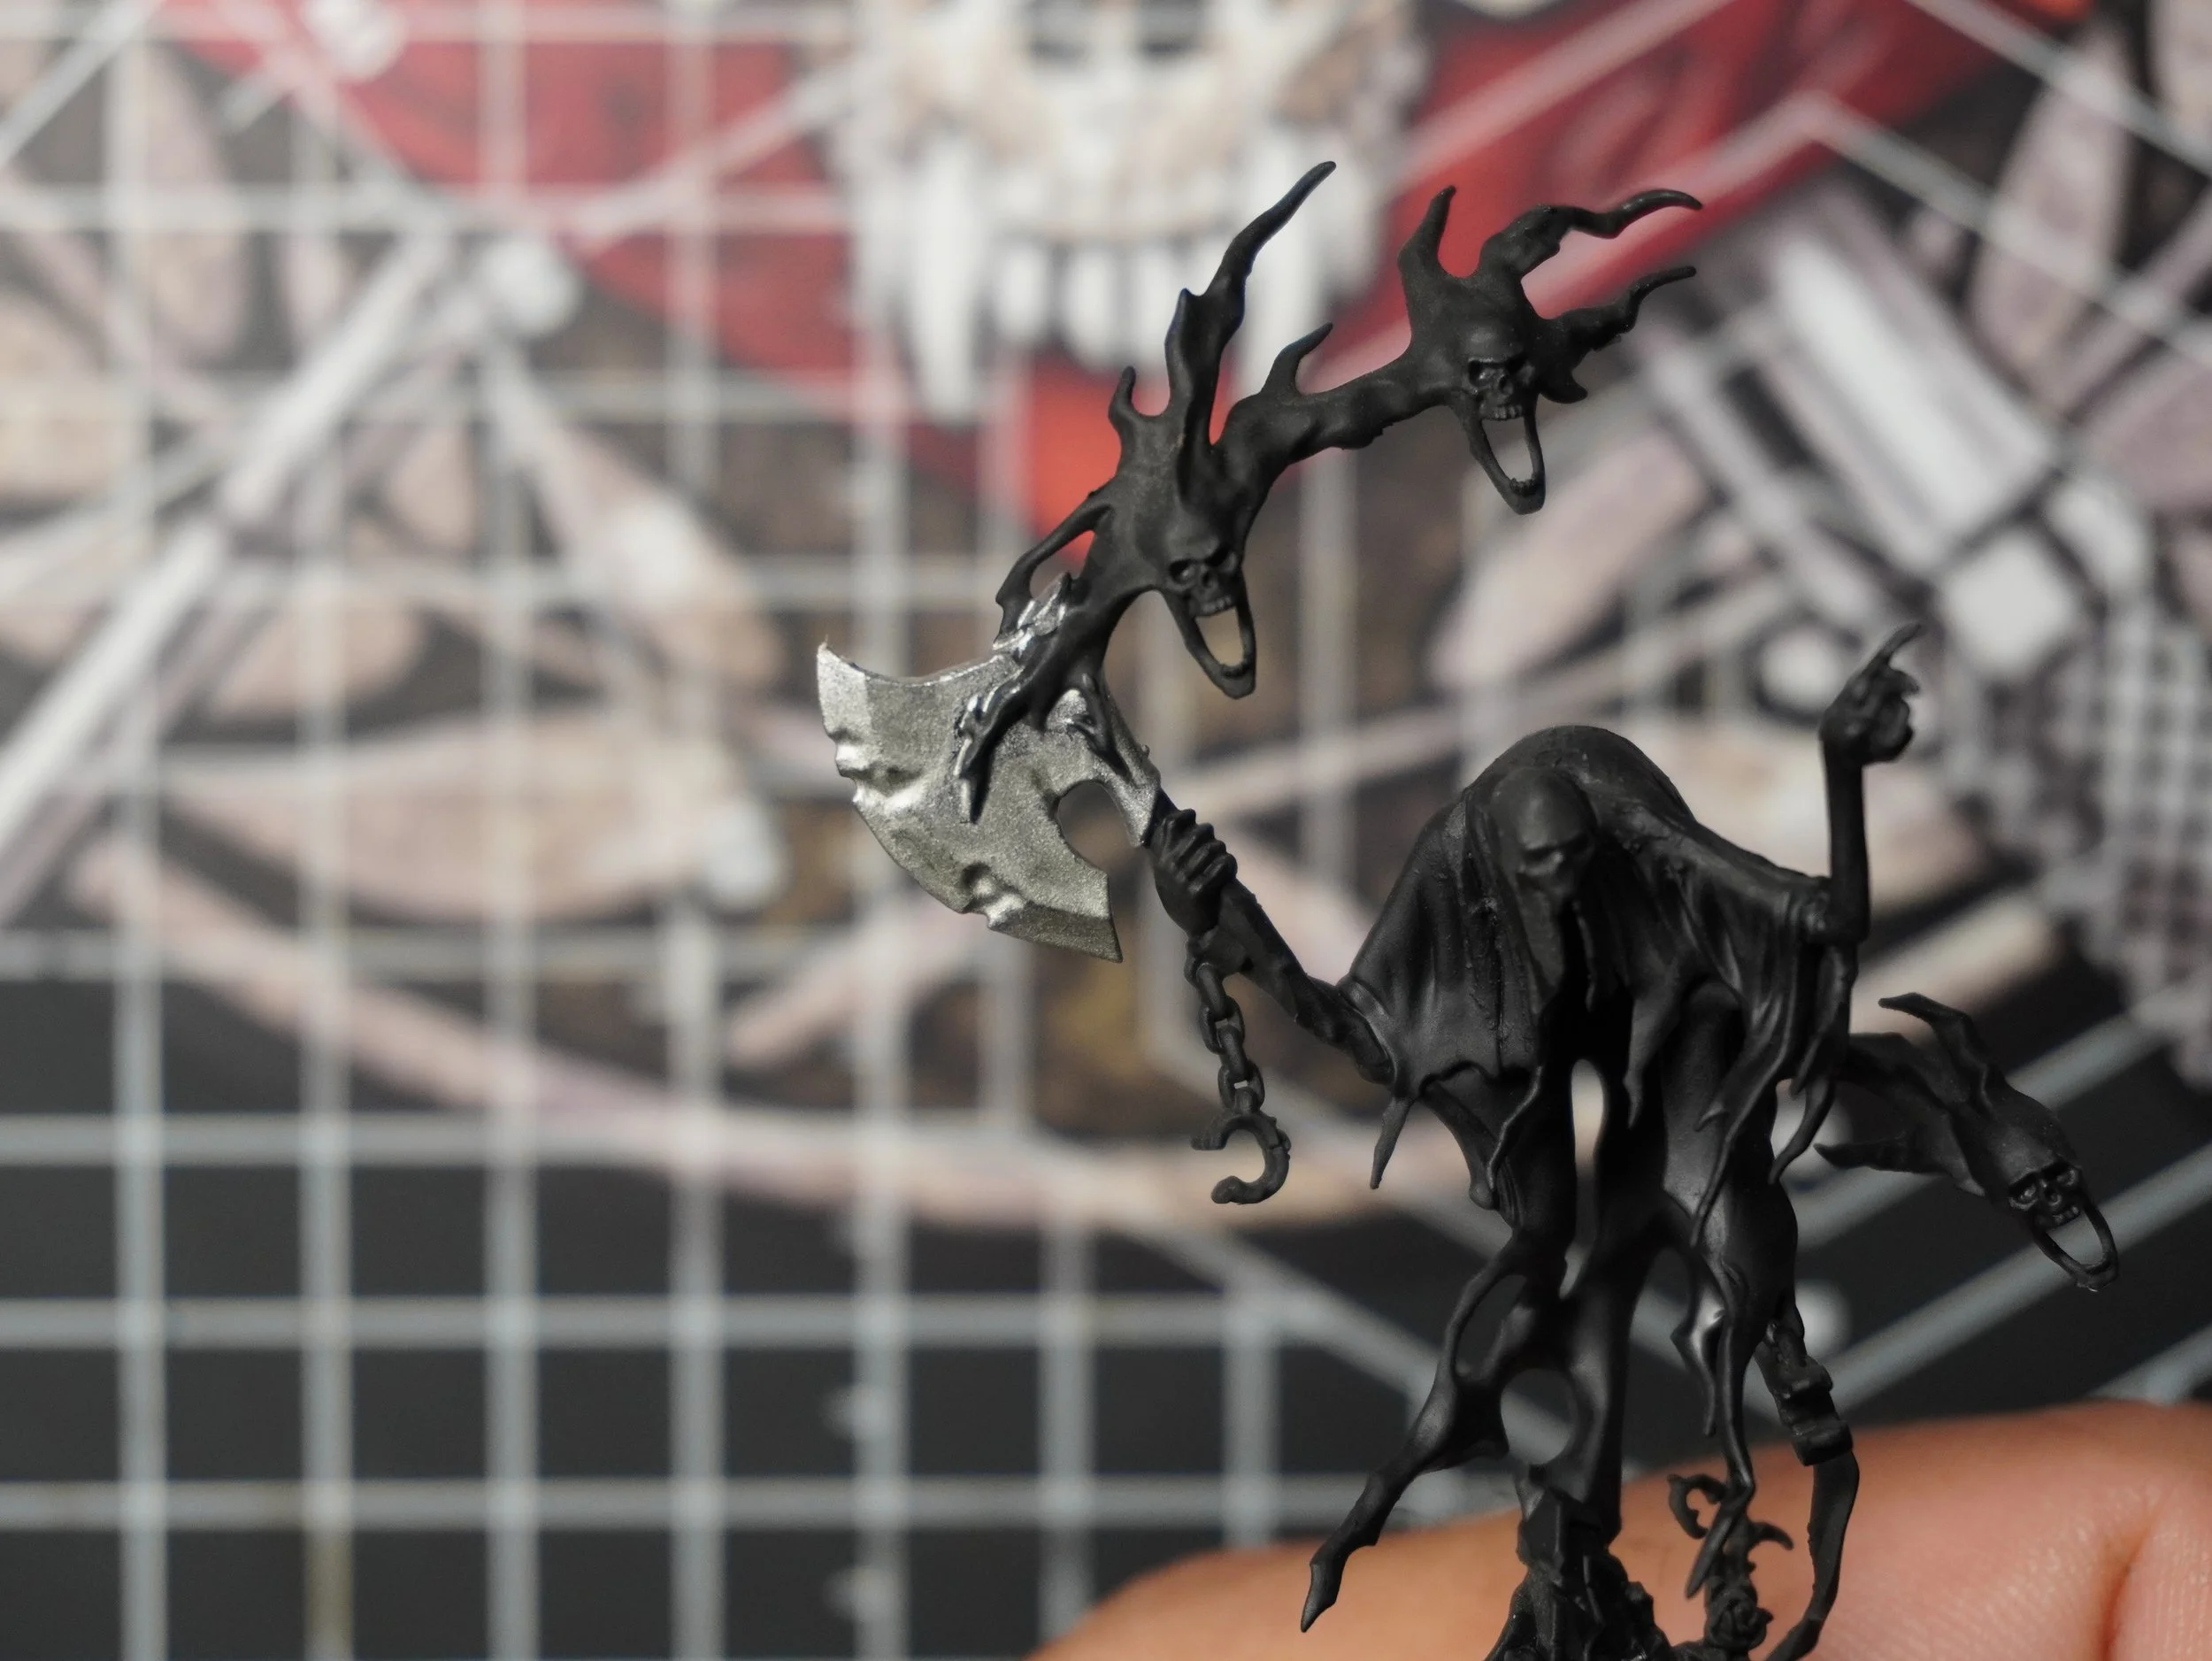
After priming black I hit the axe head with the Dark Aluminum. Painting with acrylics is based on additive layers, rust is literally different layers of corrosion. We will be covering up most of this layer but this is still an under layer that you can’t skip.
Next up is the Dark Umber and Harvest Brown. When iron starts to corrode it is typically an all over patina. This is the iron oxidizing from contact with the air. This initial coating is more commonly a darker brown where the Dark Umber comes in. The key to applying these colors is to stipple. You want them to be as random as you possibly can to signify what the environment has done to them. You also need to guide that randomness into any pock marks and deep sculpted scratches.
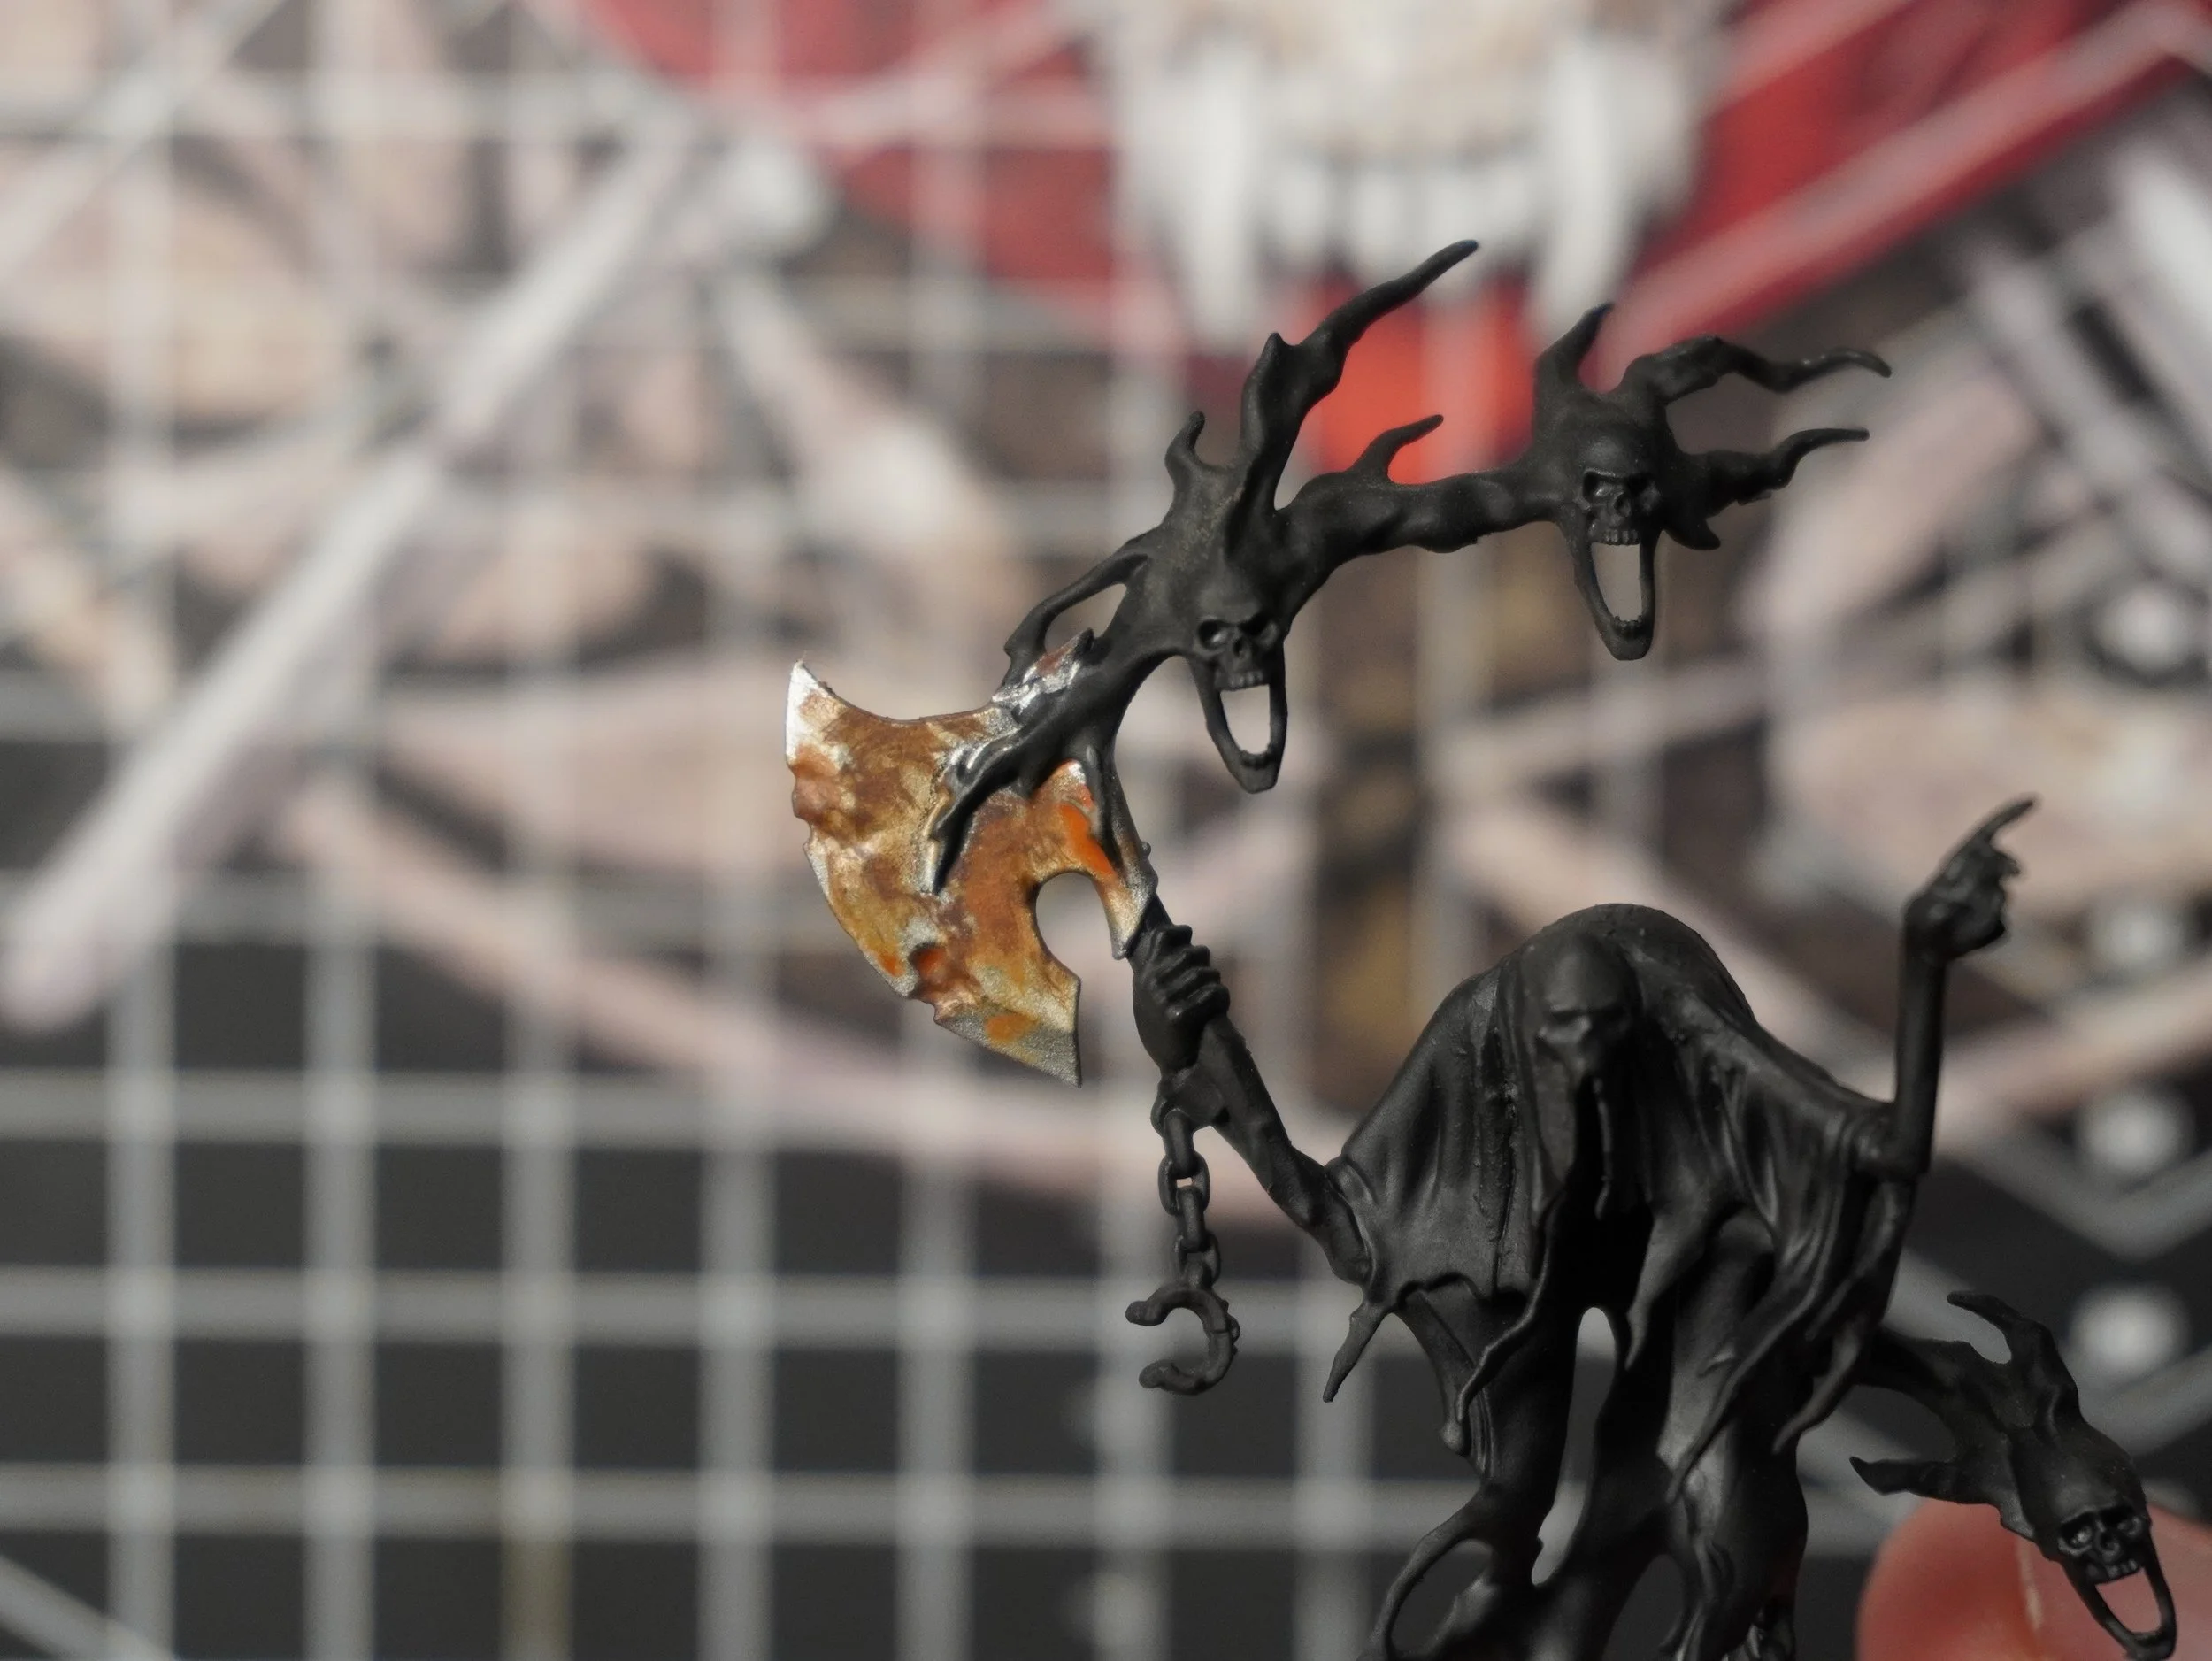
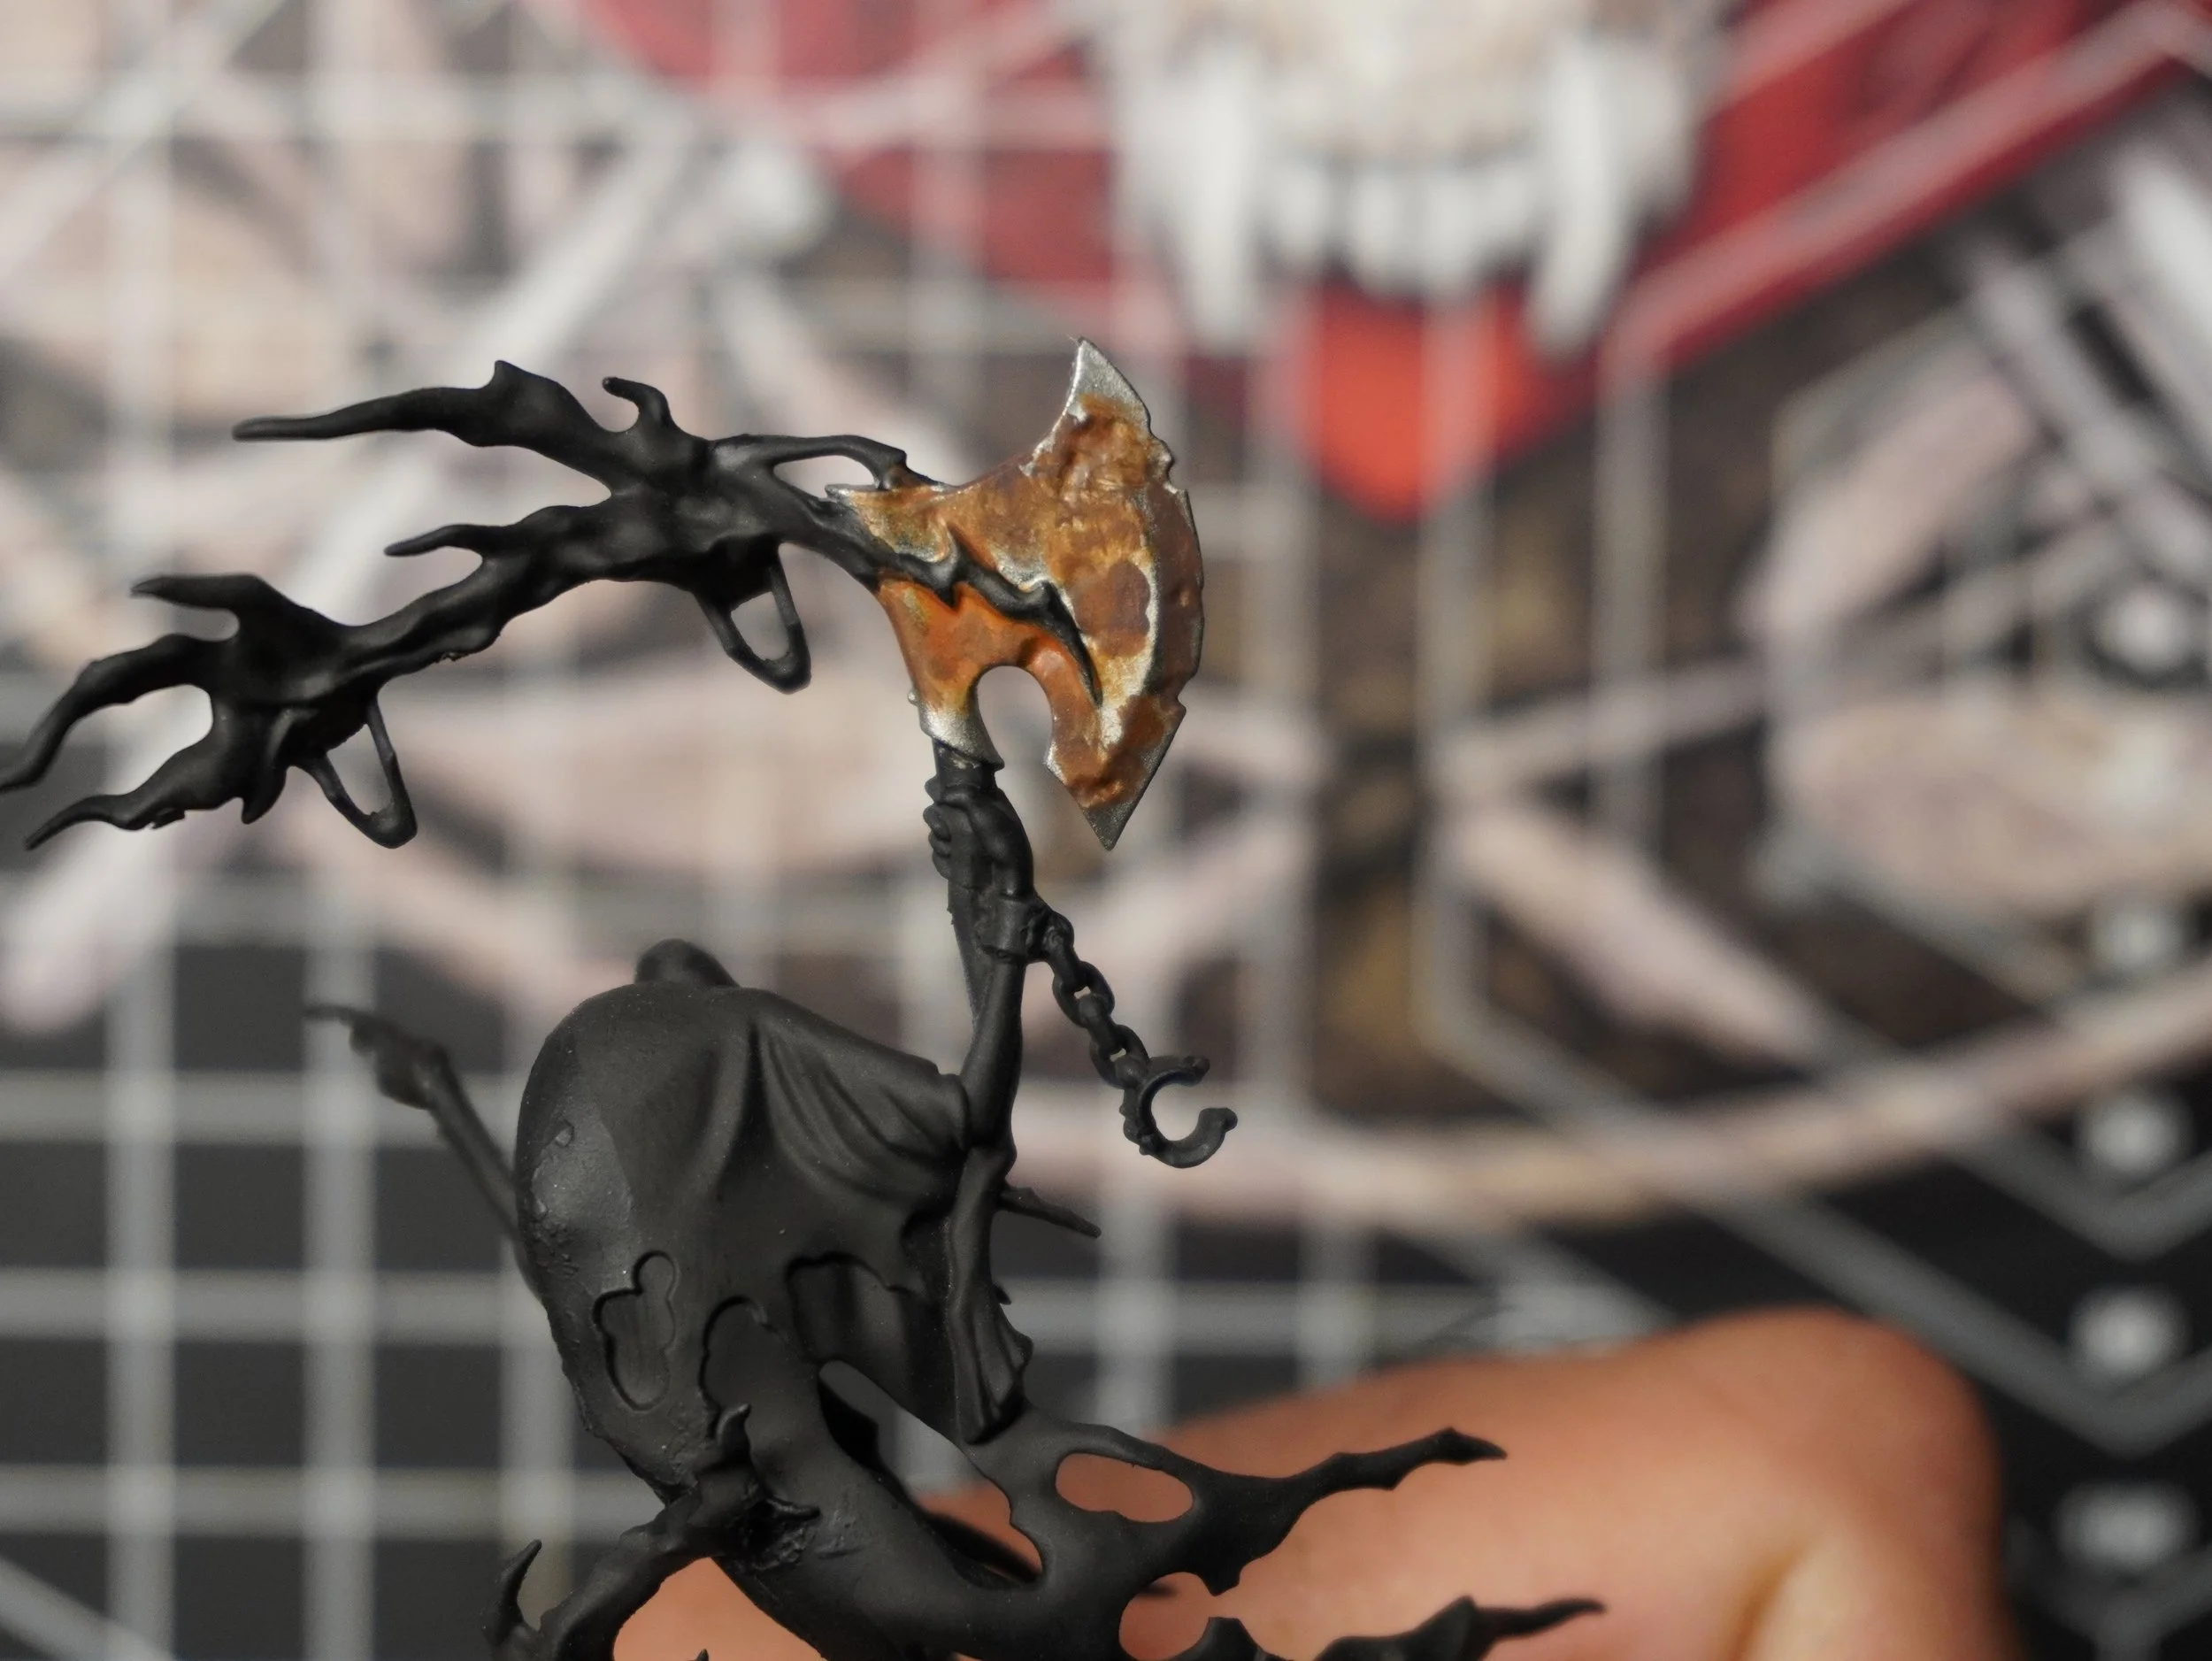
Harvest Brown was picked for it’s warm orangy tones. I cover almost the same amount of surface area as I did with the Dark Umber a lot of the time overlapping.
The Efreeti Orange is used sparsely next. This is a highlight of the rust and should only put where you want the rust to look the most severe.


Then the Army Painter Strong Tone. I picked this wash because of how translucent it is, especially when thinned with a drop or two of water. This is the same idea of the Dark Umber but at an earlier stage. A thin rusting of the whole piece of metal. It’s applied last because it also serves to marry all the other layers together.
The final step is to add more of your original metal color back into the piece. Anywhere the metal would have received damage or performed its function would scrap off the rusted parts and reveal the metal underneath. The edges of blades, and hilts, newly damaged parts of armor, outer most areas of vehicles.
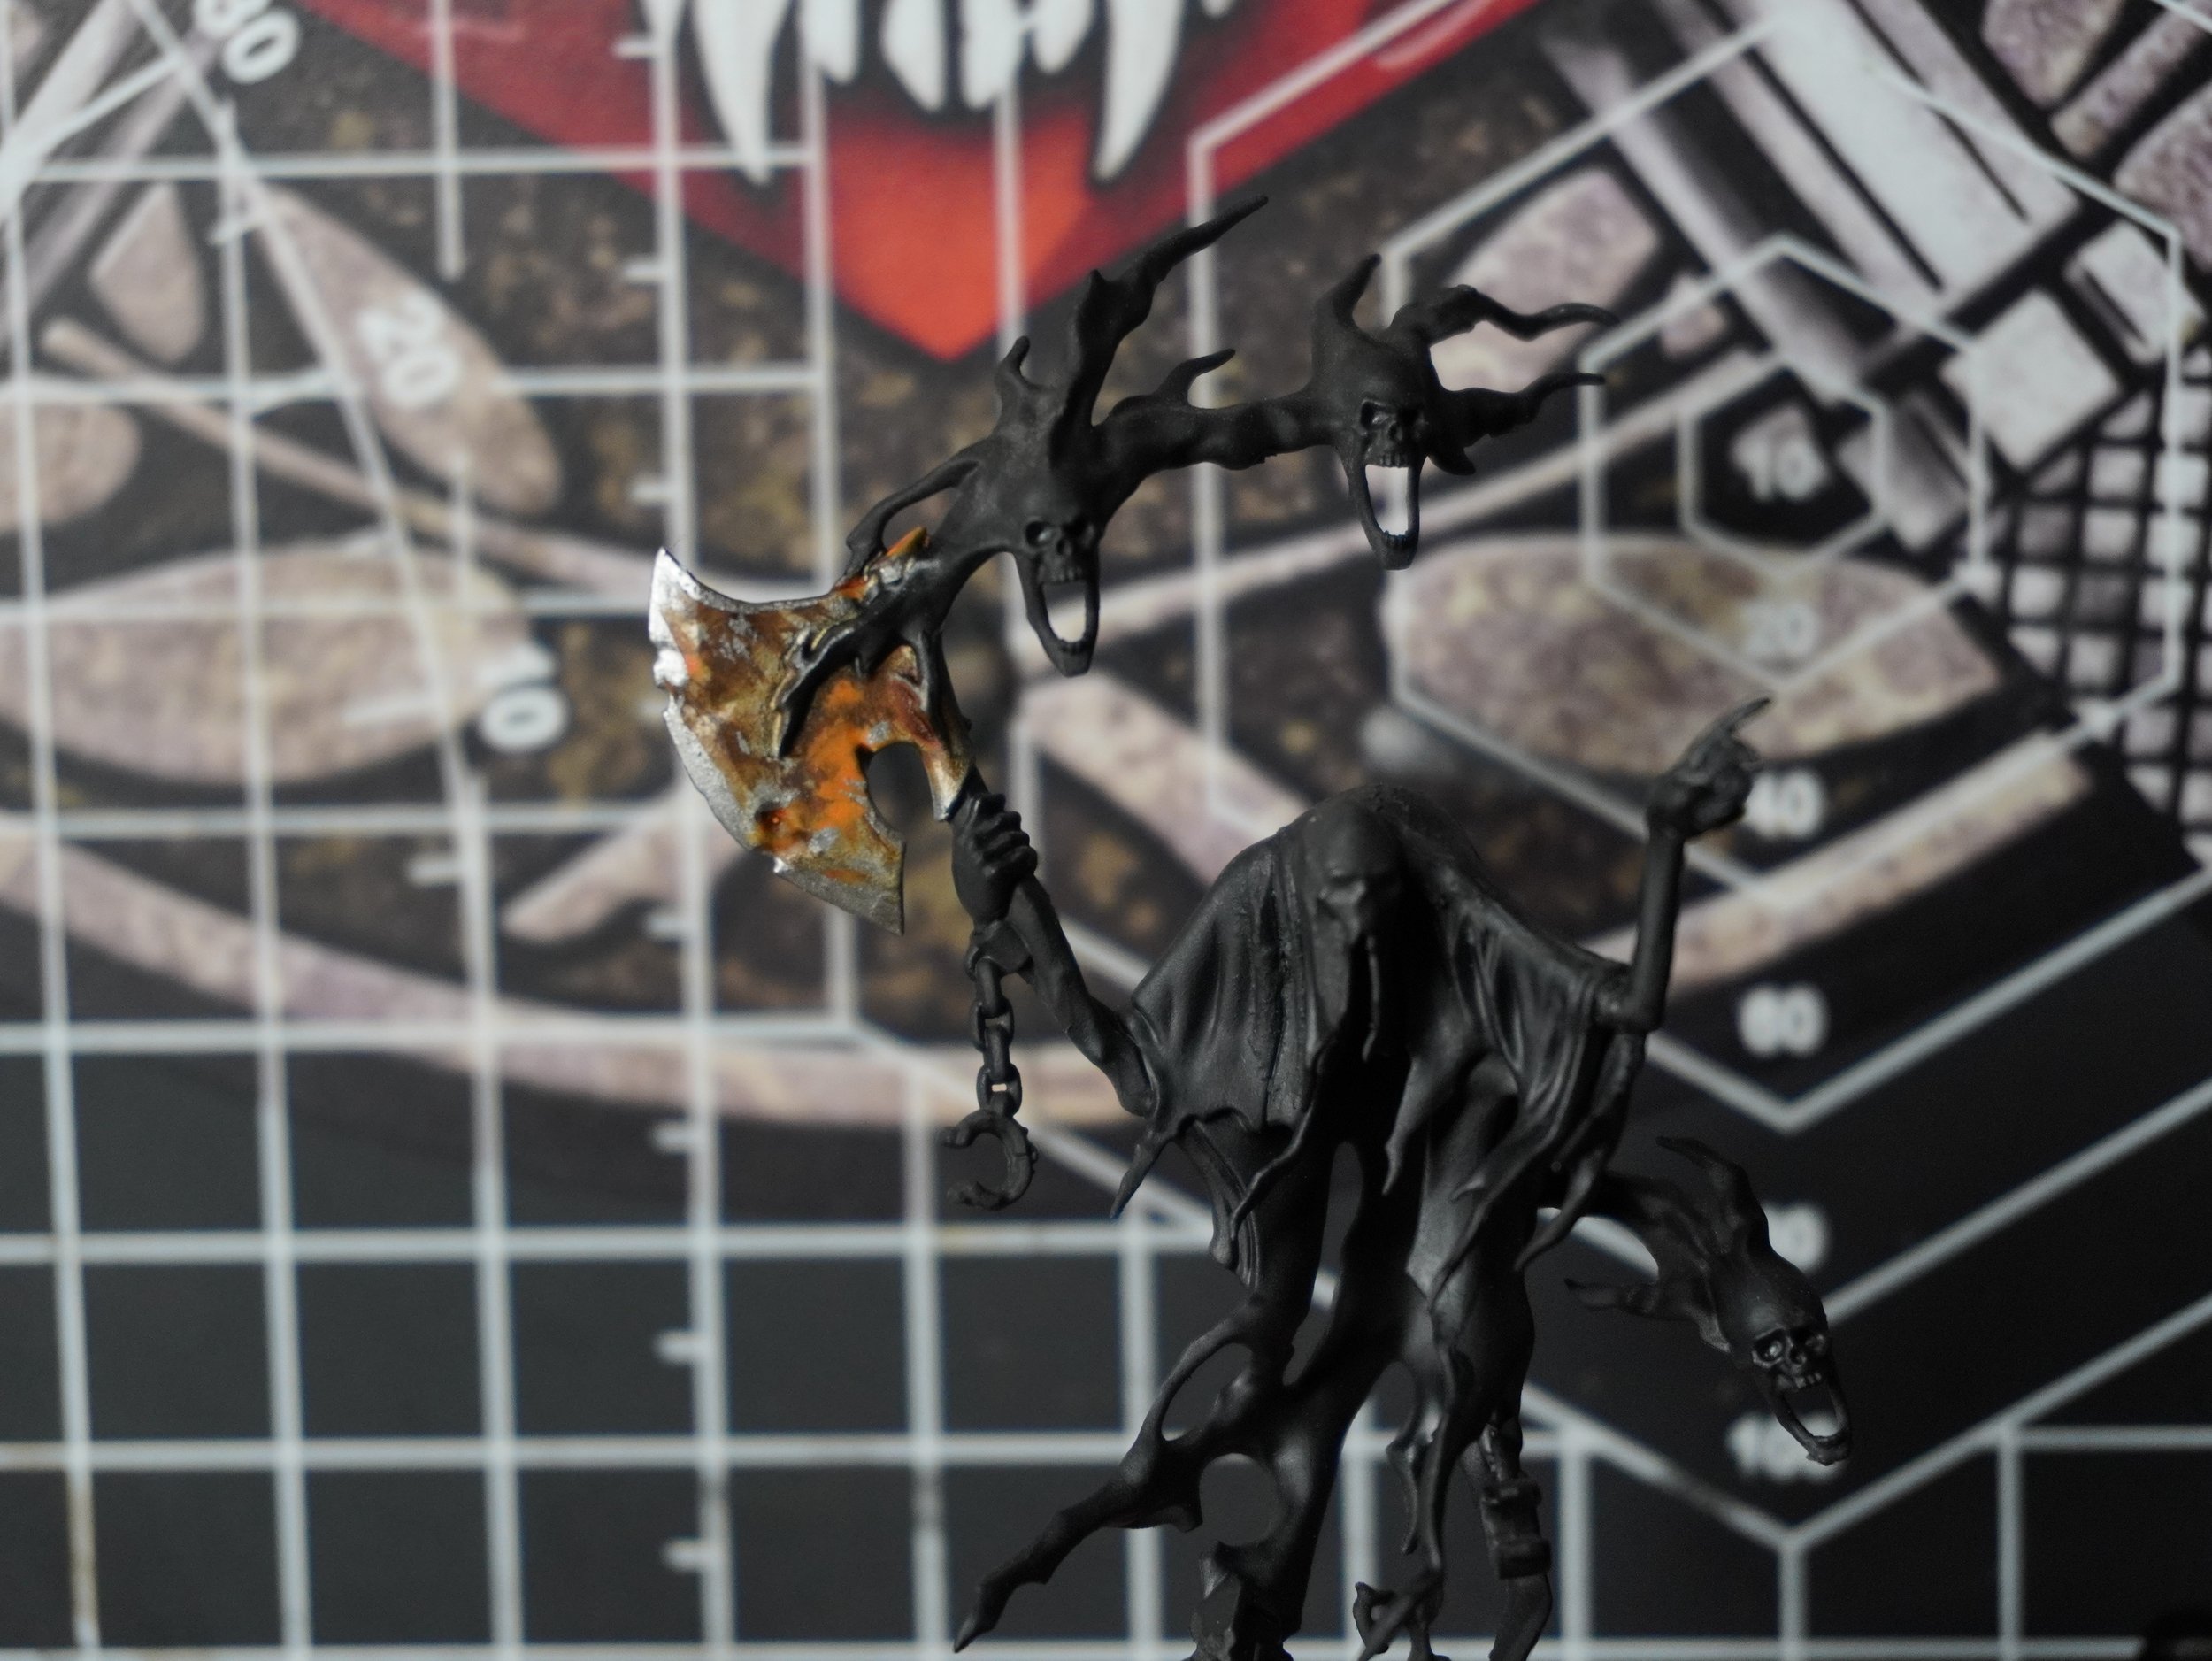
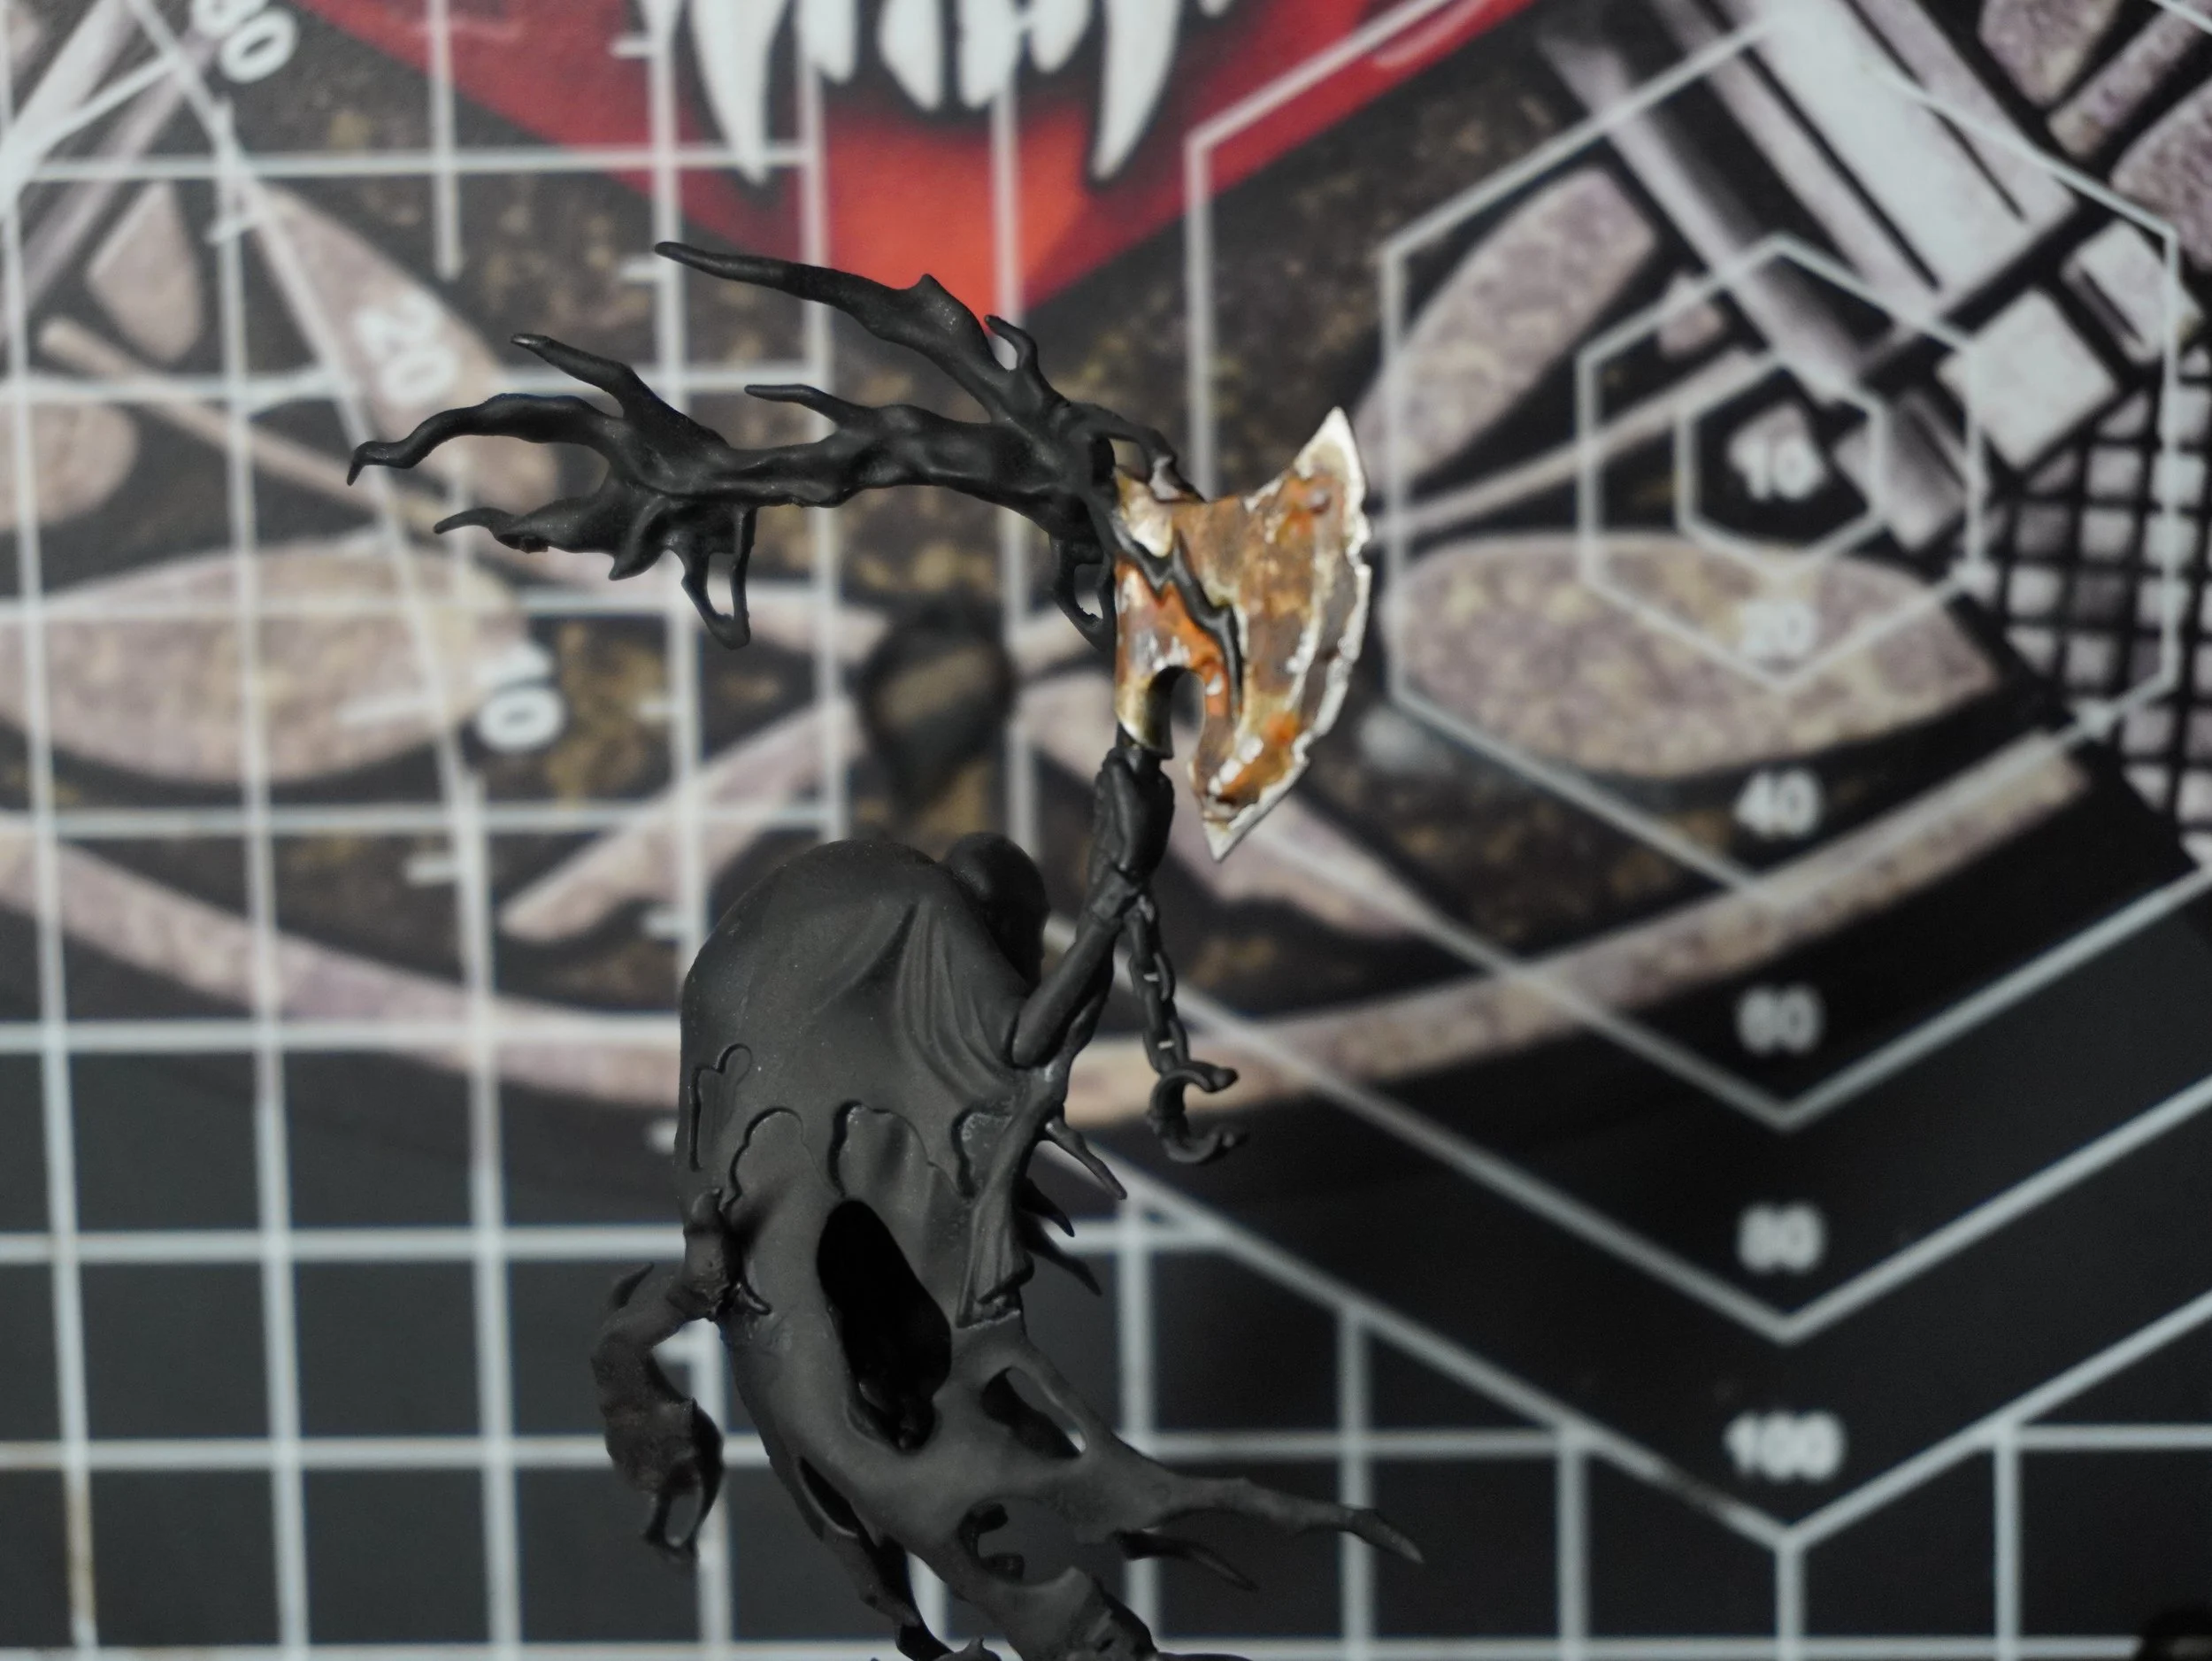
Some final notes, often in this hobby we are painting things to render them as we see them in real life. That’s not necessarily what we do with rust. Rust in real life can often be a bit boring and a lot of brown. The goal in using it in miniature painting is to add to the story of our lil’ guys while making it visually interesting.
This Blog is supported by our Patrons over on Patreon. Sign up and become a Sticker Licker! Get a Sticker in the mail every month! Oooo Aaaah!